Wednesday, July 17, 2013

I made a pallet chair and a fence deck

Myself and a few friends have been getting interested in pallet furniture lately and I've been wanting to try my hand at it.

 Pallet chair, surfboard table, and my snazzy new deck.

I figured I need something better than just a pallet out of my back door, so I was thinking of making a deck with pallet slats for decking. Then I realized that I had a whole panel and a half of privacy fence leftover from working around the house as well as some 4x4s scrounged up from work, so I made myself a quick and dirty back deck by levelling up four 4x4s and laying the fence panel over it. Saved a lot of time and effort vs breaking down several pallets for decking and it's pretty much the same wood only it's pressure treated too.

As one project begets another though, As soon as I was done with the deck, I realized I don't have any good outdoor chairs for it, so I went to woodgears.ca and used Matt Wandel's lawn chair plan with some minor modifications to use pallet wood for it's construction. Unfortunately when all you have is a hammer everything looks like a nail, and when all you have (at the house) is a reciprocating saw (harbor freight Sawzall) every board looks like a ragged mess when you cut it. Oh well, it was pallet wood before anyway. After adapting the plans and converting everything to inches (don't have a metric tape measure, keep meaning to get one) I got to work. A couple hours, a few broken boards, and some minor wood shaping with an axe and here's the result:

Next I took it up to JaxHax and sanded and stained it. Now I just need one or two more to set on the deck and wait for the heat to subside. In the meantime here's my suggestions for breaking down pallets:
It can also be a hat.

* Newer looking pallets are easier to break down, and generally split less.
* Lots of knots in the wood usually mean the wood's very weak and easy to break, or at least very dense and hard to pull nails from.
* You can break down pallets for either denailed runners or slats and runners with nails in them, not both.
*If you're wanting nail-free runners, pull up the slats with a crowbar. Chances are they'll break but occasionally you'll get lucky, then pull any nails that are stuck in the runners.
* Use a sawzall or similar tool to cut the nails off between the slats and runner beams. That's how professional pallet builders do it, and with good reason, you get the most lumber out of the pallet with the least chance of splitting the wood. Use a blade rated for steel and wood.
* Pallets are like thumbs, they don't like being hit with hammers and it hurts them when you do.
* Use a scrap block of wood to spread the blow if you're trying to knock slats off the pallet

* Learn to identify the kind of wood in your pallet. If the pallet weighs a ton and the sawing hasn't left a lot of furry looking wood sticking up it's probably hardwood like oak. If so this pallet's gonna be hell to pull nails out of, best to use a sawzall.
* Use a nail or punch to knock cutoff nails out of their holes in the slats, learn to live with the nail shanks stuck in the runners.

Sunday, May 12, 2013

Ricky's DVD Player Part 2

In my last post I introduced the problem my brother Ricky has with watching his favorite TV shows and movies and how I planned to build him essentially an arcade game system to play his shows that can stand up to his unique needs and unintentional abuse of equipment. Now I've built the player and it's been working pretty well the last couple months for Ricky. Here's the basic rundown:

Materials:

1x  5 disc DVD player
1x  CRT TV (LCD would be too easily broken, Ricky likes to tap the screen sometimes.)
1x  Composite to RF video adapter for TV
1x  Power strip
10x Arcade control buttons, (5 white, 3 black, 1 green, 1 red)
1x  Sheet of lexan for control panel
~2x  sheets of 1/2" plywood (Might be more, need to get exact dimensions)
1x  Ratchet strap
1x  6-8ft cat-5 cable, solid strand prefered
1x  RCA video cable
~16ft of 2x2 lumber
~50-100 drywall screws (didn't keep count)
zip ties for cable management
2x small cabinet hinges
1x hasp latch and padlock
2x right angle shelf brackets to hold cabinet to wall


This is just what I used, and it's by no means definitive. Feel free to work with what you have. The general design plan was to build a cabinet similar to an arcade cabinet scaled for sitting height with a flat top for ricky to be able to keep his DVD cases on and not have them fall behind the unit. The control panel's buttons are set back to give him room for a snack or drink, and the whole unit is screwed to the wall to discourage him from moving it around or trying to get into the back (it's been a problem before.)

The back panel is a door that can be locked shut, and like many arcade cabinets it's construction is basically one of sandwiching everything between the two side panels, having a shelf for the screen, and keeping the electronics down low. I don't have a photo of the back with the door on, but that also has a bunch of vent holes for air circulation.

Oh, and I built this all start to finish at the local hackerspace/makerspace I helped found a little over a year ago JaxHax in Jacksonville, so if you're in the area and happened to stumble across this page come check us out!

Here's some construction photos:

 Drilling out the holes in the lexan and control panel.

 
Installed in Ricky's House

 The painted cabinet without front panels

 Cables and buttons mounted and wired into the DVD player's button panel. As you can see the green button's different than the rest. HAPP didn't ship part of the green switch I ordered, but luckily I had one leftover from my arcade cabinet still around. They never did answer phone calls or emails trying to get the missing parts....

 Everything mounted but the screen.

 Beta tester (one of JaxHax's members' son)

 Inside the back panel.


 Wiring up the control panel. Common ground and signal wires made from CAT-5 cable.

Backside of the panel just after painting.

 The happy new owner. Only took a couple minutes for him to figure out the controls.
 The look I was hoping for.

The whole thing ready to deliver.

Monday, September 3, 2012

Ricky's DVD Player Part 1

This is my brother Ricky:


He's a year older than me and shortly after I was born he became epileptic. He's a generally sweet, quiet, and awesome guy, and his mental capacity is around that of a 6 year old. He loves when I visit him and we usually ride around his town, go to the beach, go to restaurants, listen to the radio too loud, and above all else, we go by a great video game store called Game Over! which has lots of DVDs.

Ricky loves DVDs. He loved VHS tapes before that. I have him to thank in part for getting me into electronics, since when we were kids he'd wear VCRs and video tapes out so much he'd wear holes in their buttons, cycle tapes so many times they'd wear thin and snap, and generally put them through a lifetime's worth of use in a few months. When his favorite tapes would break I took up trying to fix them, splicing out worn-thin sections, figuring out how to un-mangle tapes the VCR would eat, and reinforce worn-out rewind buttons. He's a one-man acid test for consumer video players and.

When DVD players became the norm and tapes became more scarce Ricky got used to DVDs, and fell in love with the old TV show Knight Rider, Lilo and Stitch, Dora the Explorer, and Twister. Unfortunately Ricky's not the best at keeping DVDs in good shape. My family should buy stock in whatever company presses those discs because we've probably spent close to $1000 between us all on those shows alone since even though he tries not to, Ricky's DVDs usually end up looking like this:

Scratches, cracks, scuffs, you name it. Ricky's DVDs don't live long lives. Neither do DVD players. Most of them aren't made with very large or strongly built buttons, and disc trays don't take kindly to ricky's shoving them home when he puts a disc in place.

So ever since we were kids and I began learning to dig reels of tape out of VCRs I wanted to make a Ricky-Proof video player he could use to his heart's content and never have to worry about breaking. I've looked into military grade players, ones made for small children, slot-loading players, media-center PCs, and the possibility of modifying an old CD drive that had sealed shells for CDs to be kept and loaded in, but nothing seemed likely to fare better than a $20 player and none of those would fix the problem of scratching the discs themselves or would be too complicated for him to navigate. I tried a 5 disc DVD player some time ago that could be locked but he figured out unplugging it unlocked it. No dice.

Fast forward to today a couple years later and I think I'm ready to make a shot at a player Ricky can't kill and won't have to worry about scratched discs for. One of the worst things for me is visiting him to find out he's been home for weeks without a working disc he's really wanted because it took a particularly fatal scratch shortly after I got it for him.

I built a MAME video game cabinet from scratch years ago, and noticed while making it all the ways those things are designed is to prevent customer tampering and abuse affecting the way the machine works. They're tough, they're simple to use, and they're made to work for years without any help, so they're a great starting point for designing a Ricky-proof player. Arcade buttons are designed to stand up to tens of thousands of presses as hard as you like and are mounted into an acrylic panel that's virtually water proof. With the whole thing enclosed it's hard to yank wires out of place and it saves the TV being pulled off a shelf, which has been a problem before.

Soo....... I've found myself a nice 5 disc DVD player and ordered some arcade buttons from HAPP controls, and I'll be building a DVD player with Ricky's in mind and hopefully years of functional life from it to come. Stay tuned.

EDIT: Got it built and you can see the build post here.


Tuesday, June 28, 2011

I Made Little People for a Friend

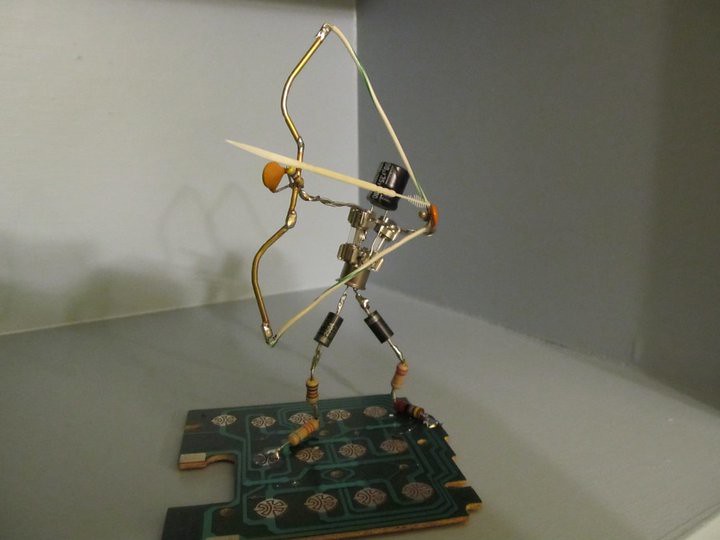
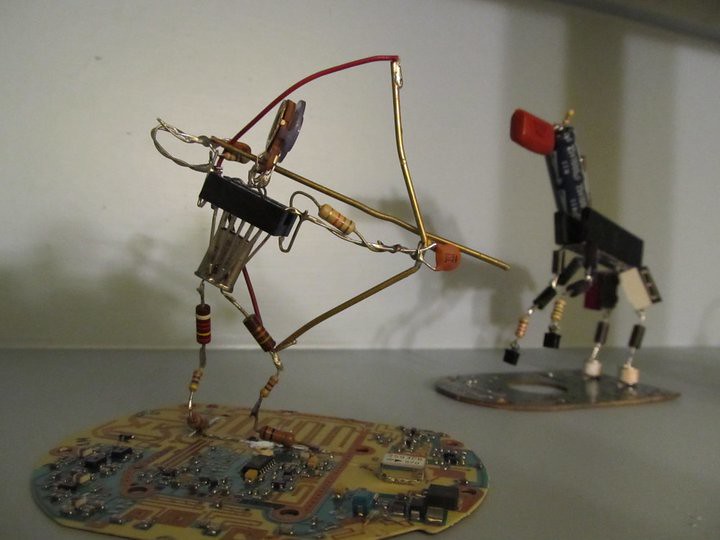
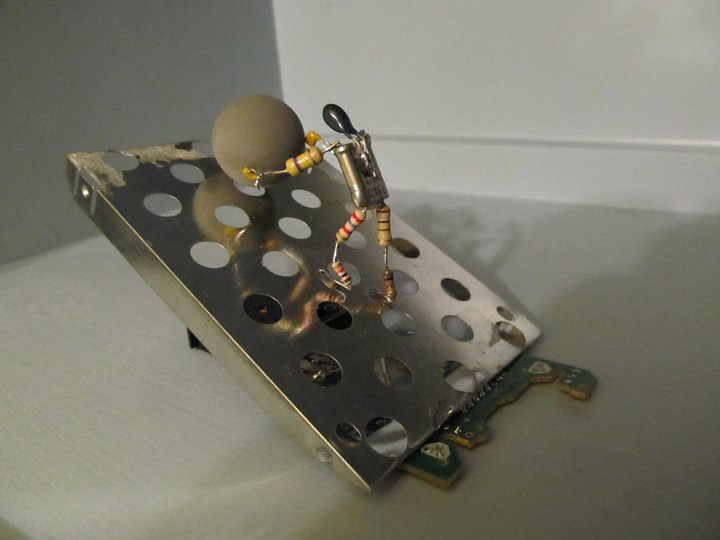
A while back I went to Austin, TX to visit my good friend Barbara Tomlinson and hang out, climb rocks, and lounge around for a week. While she was at work she asked me to make her something with a small mountain of unused electrical components and general goodies she had around her place, and these are what I came up with over a day or two. The gears turn on the panel piece and I made her the archers since she's been cross that I sold the archer a while back and it wasn't to her. Sisyphis and the horse just seemed to pop up and that mouse ball was asking for someone to roll it.


I Made a New Post on S2S (and a bunch of stuff)


Hey all, I've been pretty busy in the last couple months with house and work and bank stuff, but I've also been making stuff too. Among them are a motorcycle parts mouse, motorized 1920's style bicycle, a charcoal forge, a twisted railroad spike knife, tongs, another mini motorcycle, and the start of another full-sized human figure. Czech it out here on Scrap to Sculpture.


I've also made a picnic table out of recycled wood that's strudy enough to hold up a few hundred pounds of steel and act as an anvil stand:


And a nice deluxe rabbit condo largely from pallet wood:
......
But I have no photos of it at the moment. Dang.

Saturday, January 8, 2011

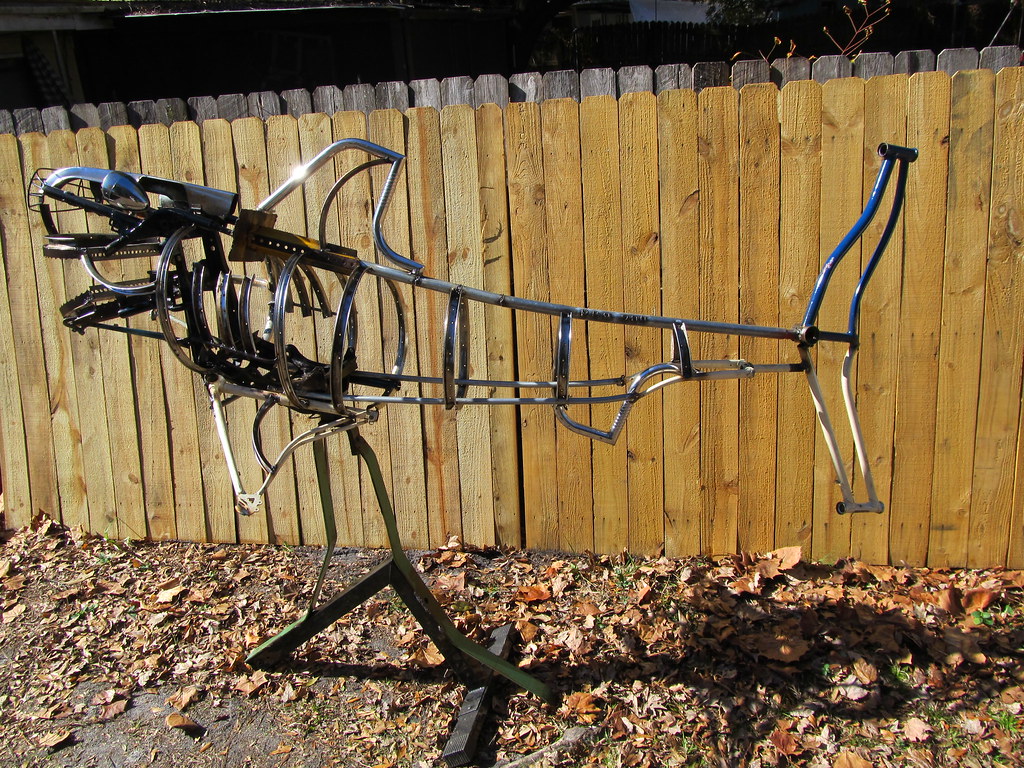
I Made a Shark (his name's Nibbles)

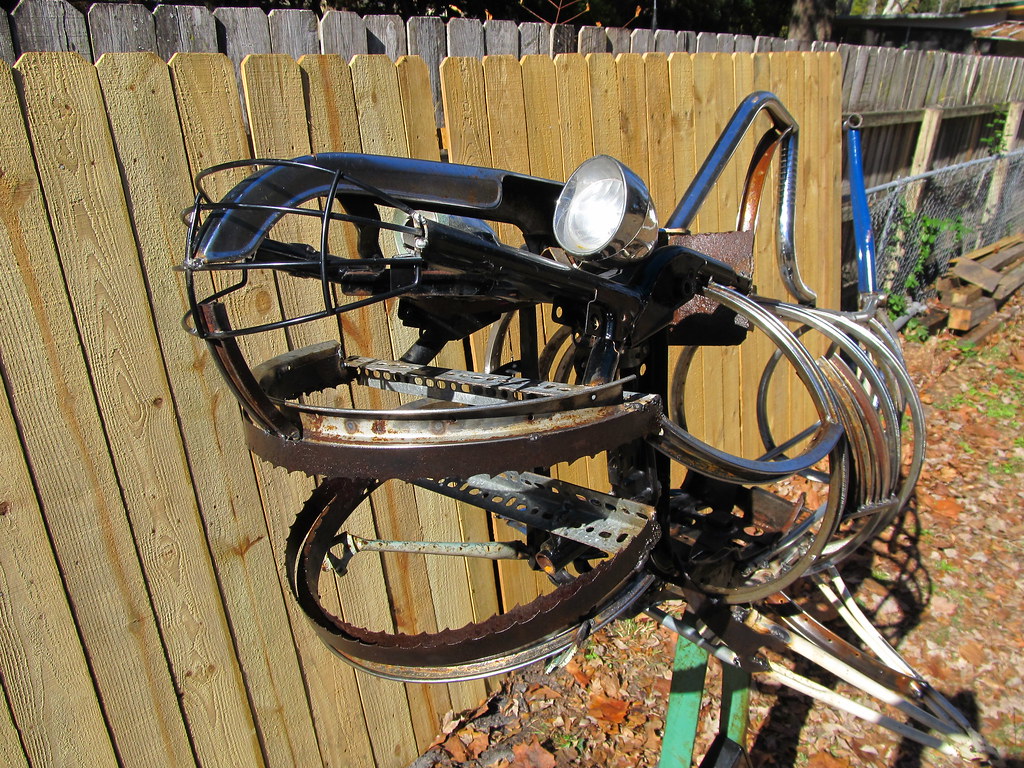
With the house being at a pretty stable place and having a space between the holidays and school/more house work starting back up I figured it'd be a good opportunity to make something new. I went and saw my friend Barbara after Christmas and among a bunch of other stuff she gave me there was a few chunks of a rusty old sawmill bandsaw blade which was screaming to be made into some teeth. We'd watched some of "Inside Nature's Giants" too, including an episode with a Great White, so when I grabbed a couple bits of blade that bowed into a D shape easily I knew a shark would be really nice to do with those blades.

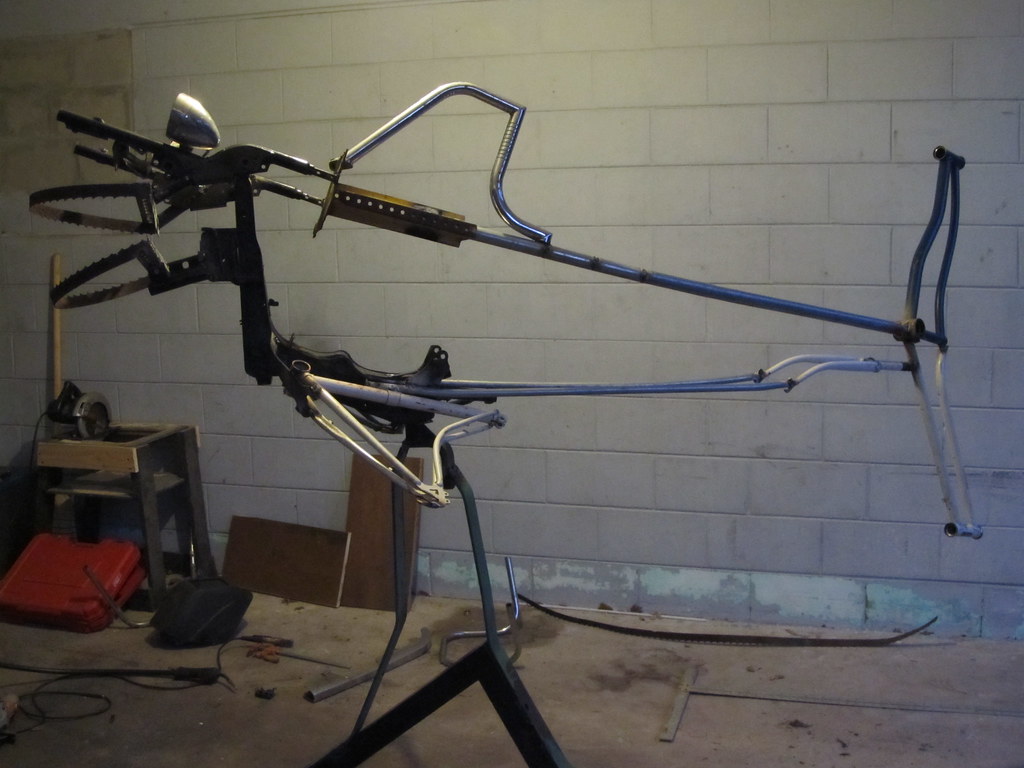
I cleared out a spot in the carport to lay out some scraps and see what might fit where. A couple of old ladie's bike frames seemed to have a good shape for a tail, a leftover hunk of motorcycle highway bar would make a fine dorsal fin, a conduit spine, and a couple chunky bits of motorcycle and scooter frame would make a good base for the chest and head.

Cut, bend, bang, clamp, and weld and the basic structure came outpretty easily. Also after I cut the bike frames to make the tail I realized how nice and similar the leftover frame chunks were to the shape and size I needed for pectoral fins. I only managed to hit my foot with a hammer twice in shaping them the rest of the way to where I needed them too.

Before going much farther I wanted to get the whole thing up in the air at the level you'd be looking at it from so I didn't wind up attaching something in a way that'd look fine on the ground and awkward at eye-level, so I went about making a square peg fit in a round hole. The scooter frame chunk was in about the center of the body and had a nice reinforced chunk of tubing that used to support the handlebars and floorboard on a scooter in a previous life, and I figured it'd work well as a sturdy pivot in it's current life. I also found out that this hole was just about the same size as a small hitch receiver which I no longer had any use for since I traded my trusty CR-V for a Tacoma a while back. I've never seen a square peg go in a round hole so well.

Now with the whole thing lifted in the air I put all the big fins in place and welded the top jaw up too. It was starting to look like a shark, but only from the side. Long-ways it only looked like a shark if you squinted and turned your head sideways, so I needed something to fatten up his cartilaginous bones. Rust-locked rims from a kid's bike looked just about right, but I didn't have enough to fill in everywhere I wanted to. I tried a local bike shop near my house to see if they had any similar wheels, but they only had aluminum ones. Then I tried the trusty rusty cycle shop near my dad's house since I needed to get a few things straight on my bike too and sure enough they had my bike right and a mess of small rims waiting for me before the evening was out.

The next morning dad brought over a bunch of lumber and plywood for the new roof, so I had to retreat to the back yard to work on the shark. The rims worked out great to fill in the body and give him some shape, but I was still worried about how I'd make the nose and head work out. My scrap pile is already on the skimpy side since the move, but it always seems to have something tasty and just right for what I need if I kick it just right. Turns out football helmet face guard + motorcycle chain guard = shark nose.

After that it was pretty close to done, so I added the last bit of highway bar as a back fin, another row of teeth, and a few other little bits to complete it. Since the archer looked so much better and felt so much more done once I wire-wheeled and clear coated him, I did the same for Nibbles. I made sure to go thick on the teeth, and that bandsaw blade feels nice and slick now. Can't wait to do some more stuff and see when I can go hopefully clog up the art walk again.

I've Been Making a House (with lots of help)


That's right folks, I'm not dead, but I haven't posted in a long while. The biggest reason for that aside from the holidays was that in October I moved into a house and started renovating it. I'll have to get some before and after photos up, but it started out looking like a pack of wild dogs lived here with holes in the wall, nasty smells and trash all over the place, and a patchwork of half-assed and jury-rigged repairs spanning back at least a decade.

Started out by gutting the place out: carpet, old heaters, nasty linoleum and congolium tile, trash, filthy counters and cabinets, etc... and about $200 worth of scrap metal behind the house which paid for a new front door since the old one had a hole rotted in the bottom almost big enough for a cat to get through. Then it was on to drywall, cleaning, and since my old house's lease was up: sleeping in the gutted shell of the new place. Waking up every morning with a nose full of drywall dust and no heat turns out to be a good motivator for getting to work.

My dad, me, roommate Justin, several of my friends, and some of my dad's friends and associates helped straighten out wiring, replaced every receptical and switch in the house, added a bigger circuit breaker panel, dropped the ceiling in the kitchen and hall to make room for central AC among other things, replaced ratty and chilly old windows (though there's still one left right now), and painted just about every surface in the house but the slab.

We also cut down and hauled out two big sycamore trees and a really big oak that had roots sticking several inches above most of the front yard, had ruined the driveway, and were threatening to do the same to the slab of the house though luckily it hadn't already. We also put up a privacy fence on the side of the house where the neighbors are a little too rowdy to want much to do with.

I also got two sets of 45 watt solar panel kits from Harbor Freight during the holiday sales and snagged a couple of nice big batteries from work as a storage bank, it's just sitting on the roof mounted to a pair of 2x4s. It's been working quite nicely and I've had my laptop and phone running on solar power ever since without running the batteries down even when it was cloudy several days.

And to top it all off the next and hopefully last big projects now that the house is starting to feel more like a home are to put a new roof on (and increase the pitch as well as change some other stuff about it), enclose the carport as a garage/workshop so I can finally stop working on things out in the weather and not have to worry about my tools walking off or getting wet, and turn the back porch into a master bath with attached laundry closet. Oh yeah, and we have to paint the outside once that's done. Still lots more to come, but holy hell it's come a long way already. Once I've got my workshop done up I should be able to more comfortably work on stuff, so stay tuned!