Tuesday, December 16, 2008

I Made Stuff for Rabbits


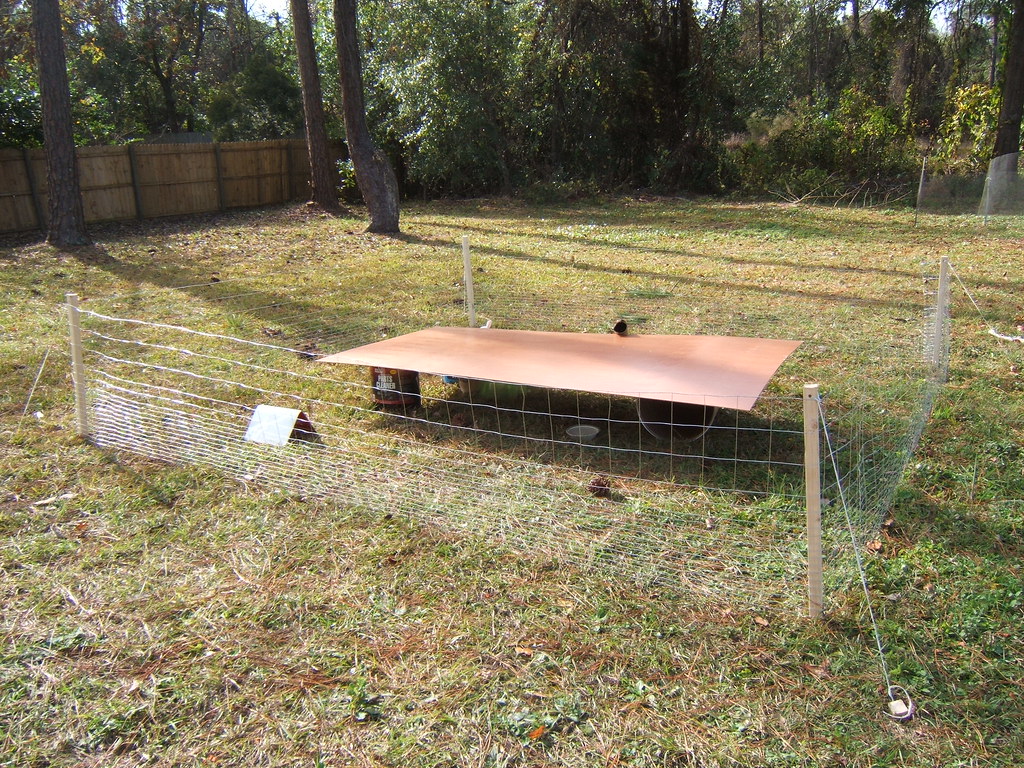
The other day I got a bunny, so did my roommates. They needed a place to chillax and do whatever rabbits do like poop and run away from anything that moves or makes sound (supposedly they'll get more relaxed within the week), so I got some short pen fencing from [Giant hardware emporium] and some 2x2 poles and made a pen.

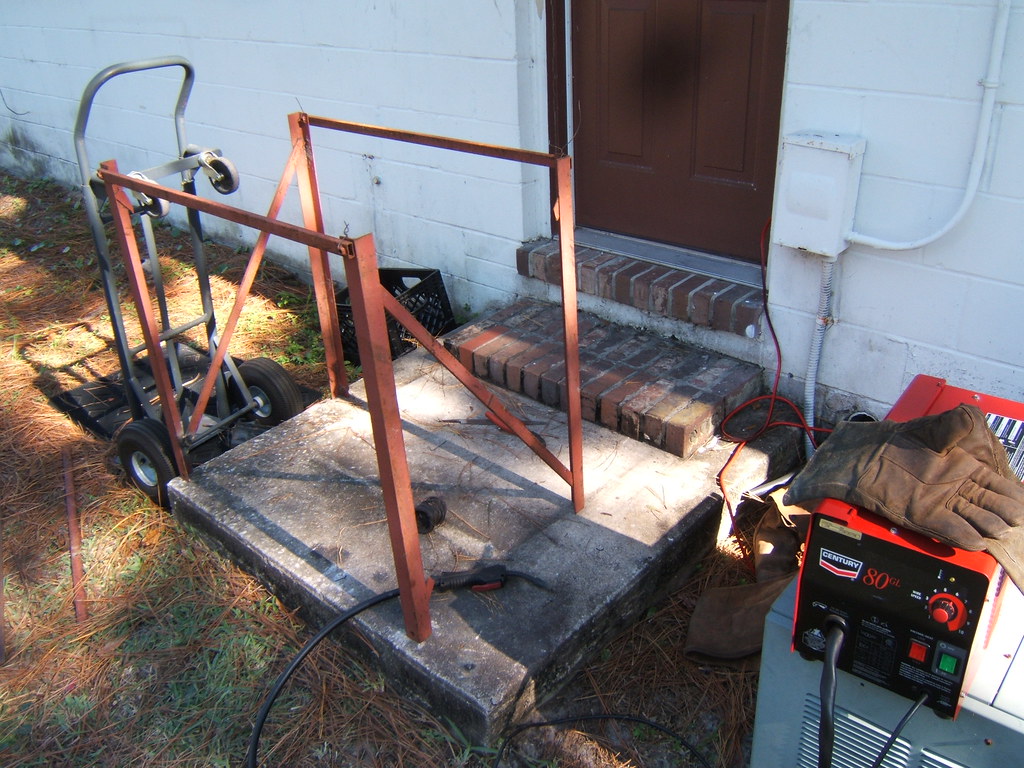
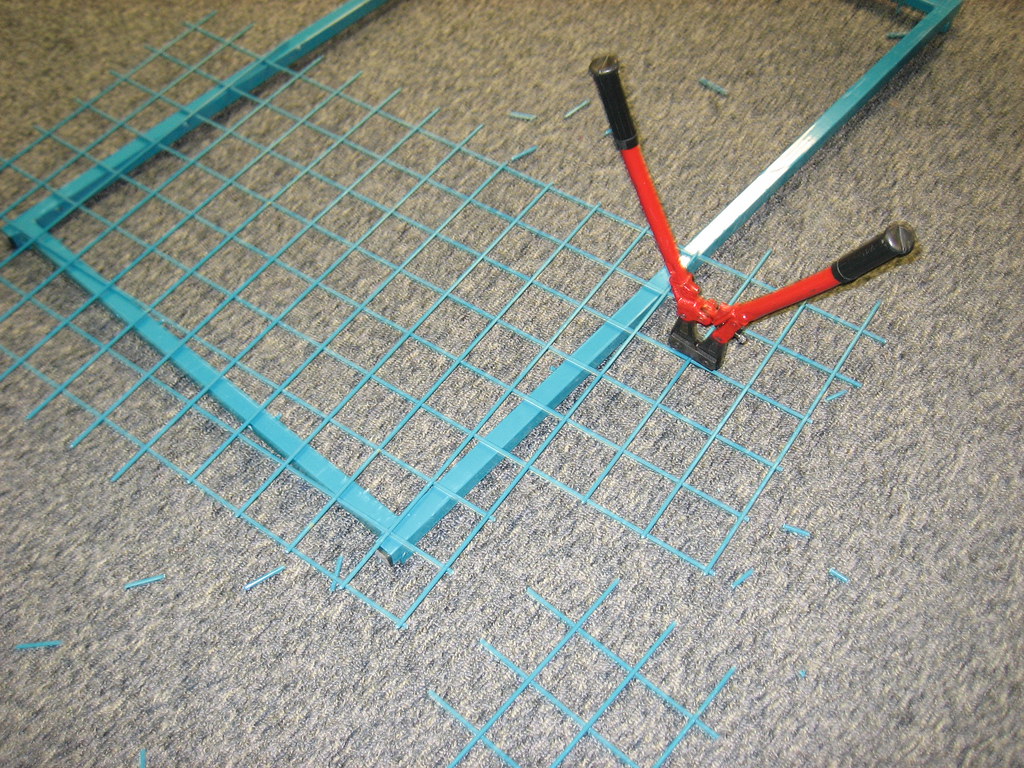
With a 50ft section of fence I decided to make each side 12' long, which leaves a little extra for future patches or mess-ups during making it. I cut the poles about 1 1/2' longer than the height of the fencing, then hammered them into the ground in a square shape. I used some baling wire to hold the first end to one of the poles and brought it around each corner, trying to make sure the fencing stayed as taut as possible and bringing the bends to a square corner at the corners. Next I hammered 1' stakes into the ground at an angle to the poles, drilled holes in the tops of the stakes and poles, then tied lines through each pole down to the stake as tightly as I could to prevent the poles from sagging inward. I also hammered the stakes down flush with the ground to tighten them up some more, and help mitigate the trip hazard.

To give them some shade and cover I took a couple of metal cans and some paneling to make a lean-to for them. All seemed pretty well the first couple days and we got comfortable letting them hang out on 
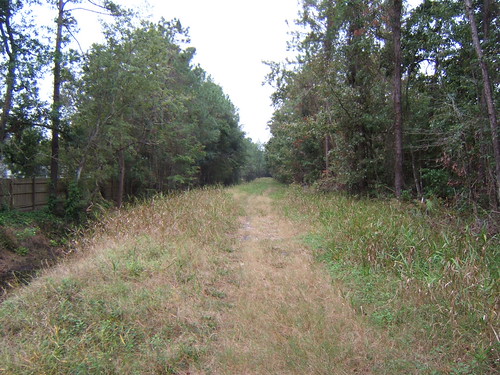
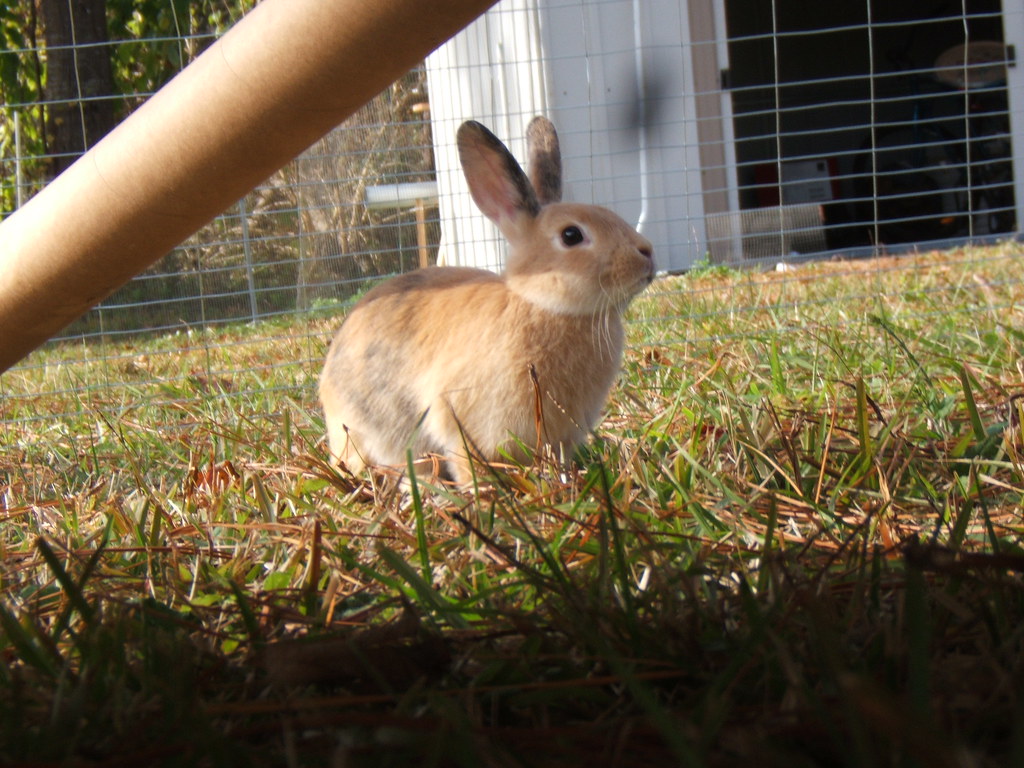
their own for decent amounts of time, but the more skittish of the two (Bonnie) managed to push her way under the mesh and made a break for the woods 
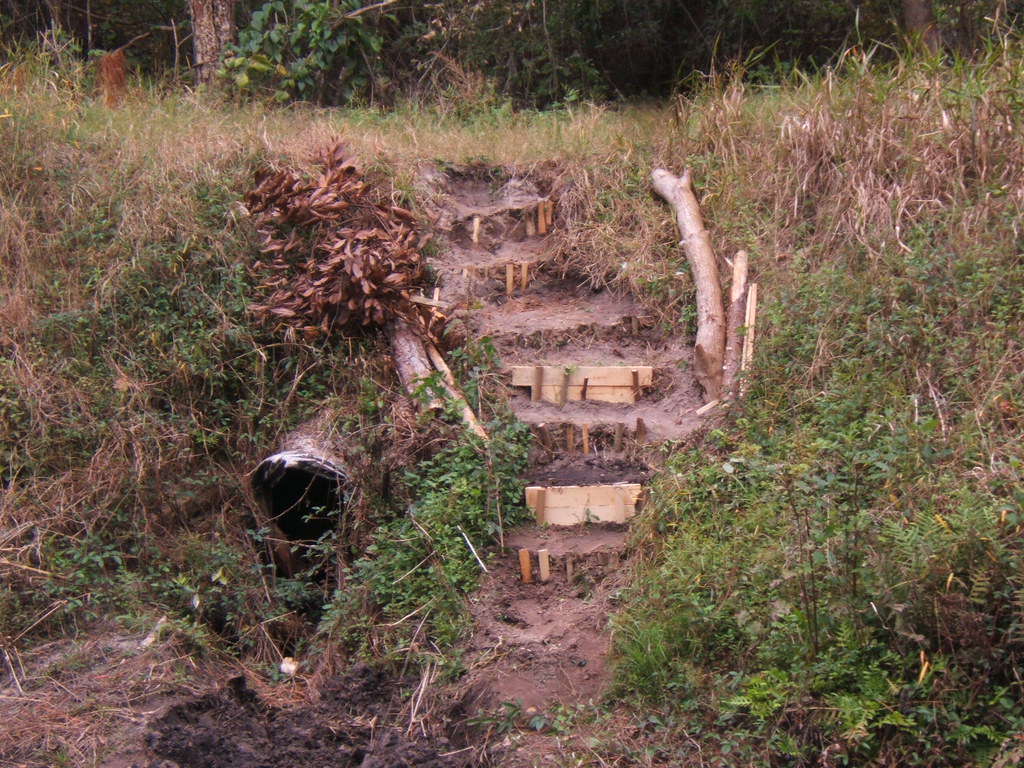
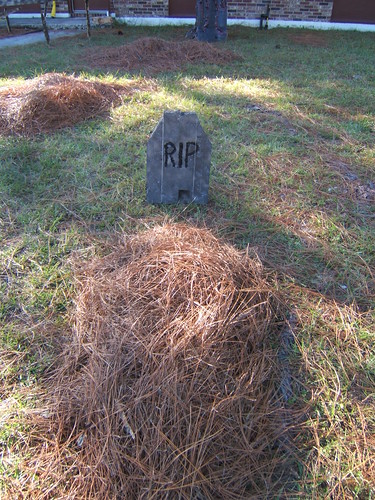
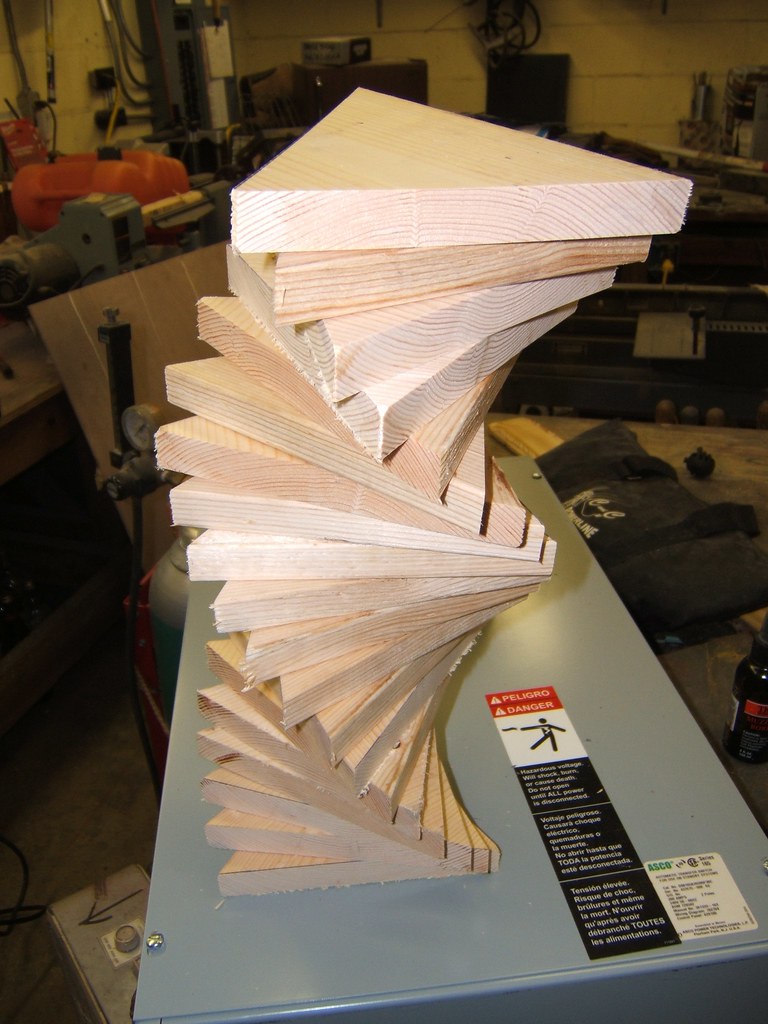
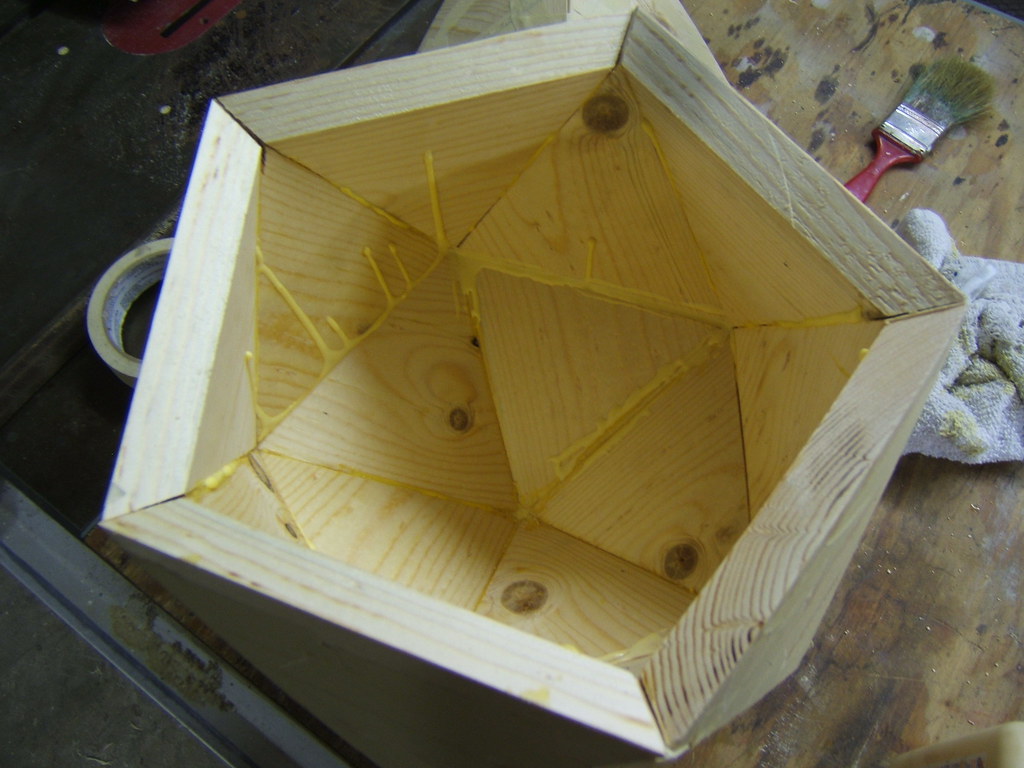
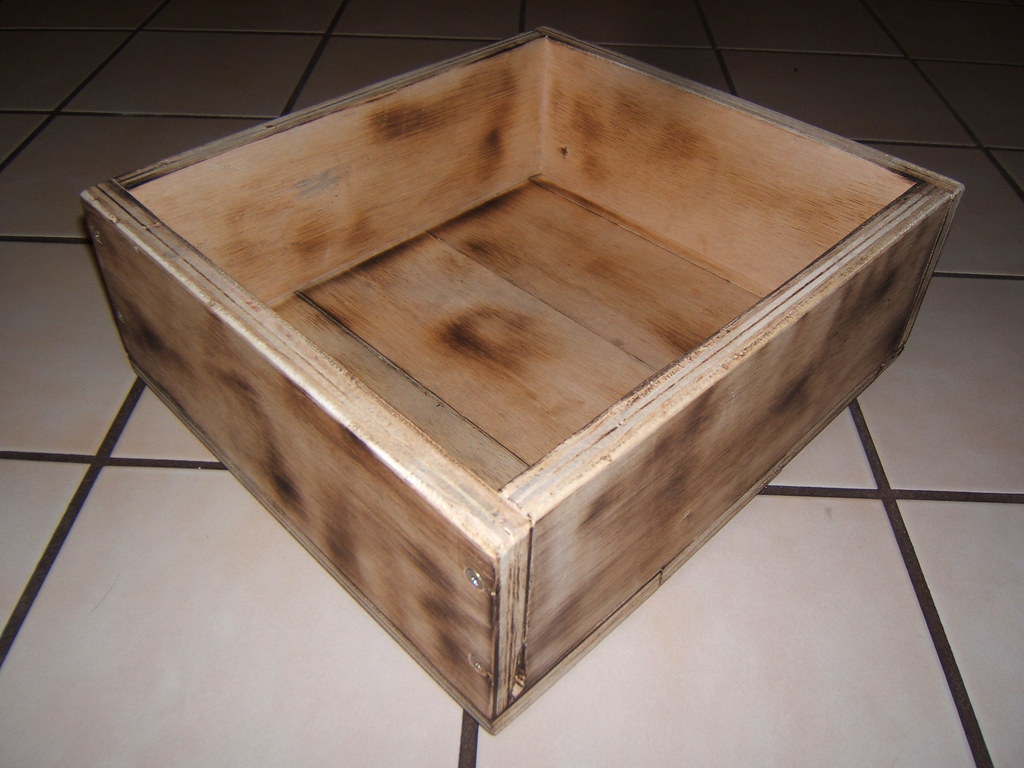
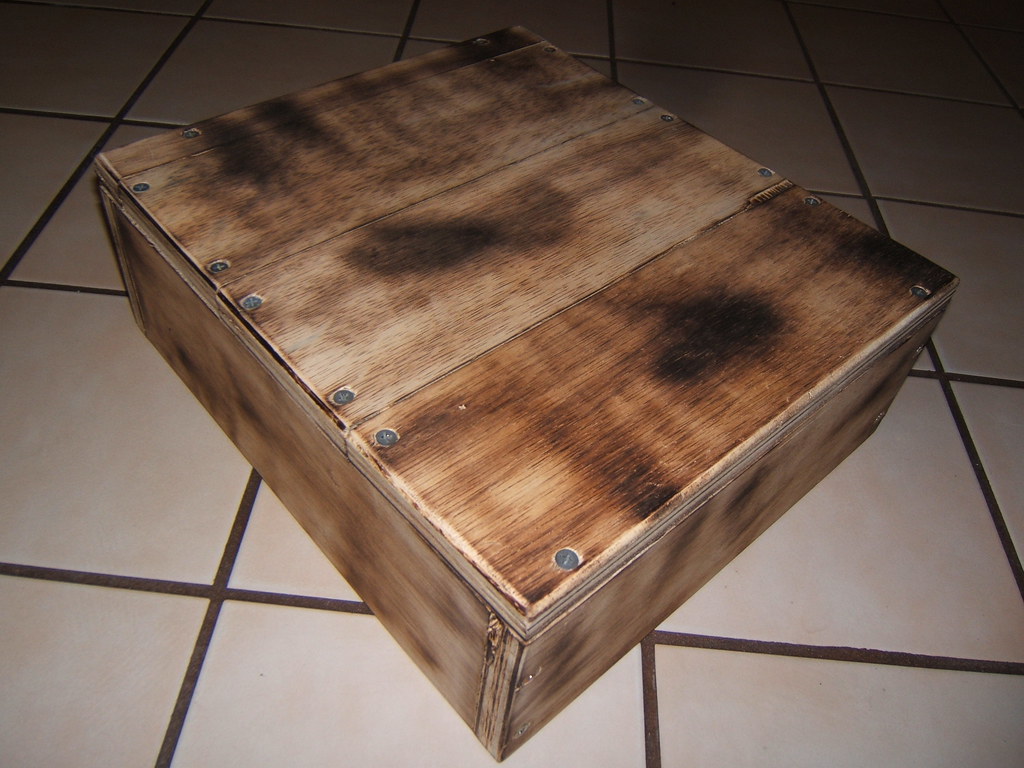
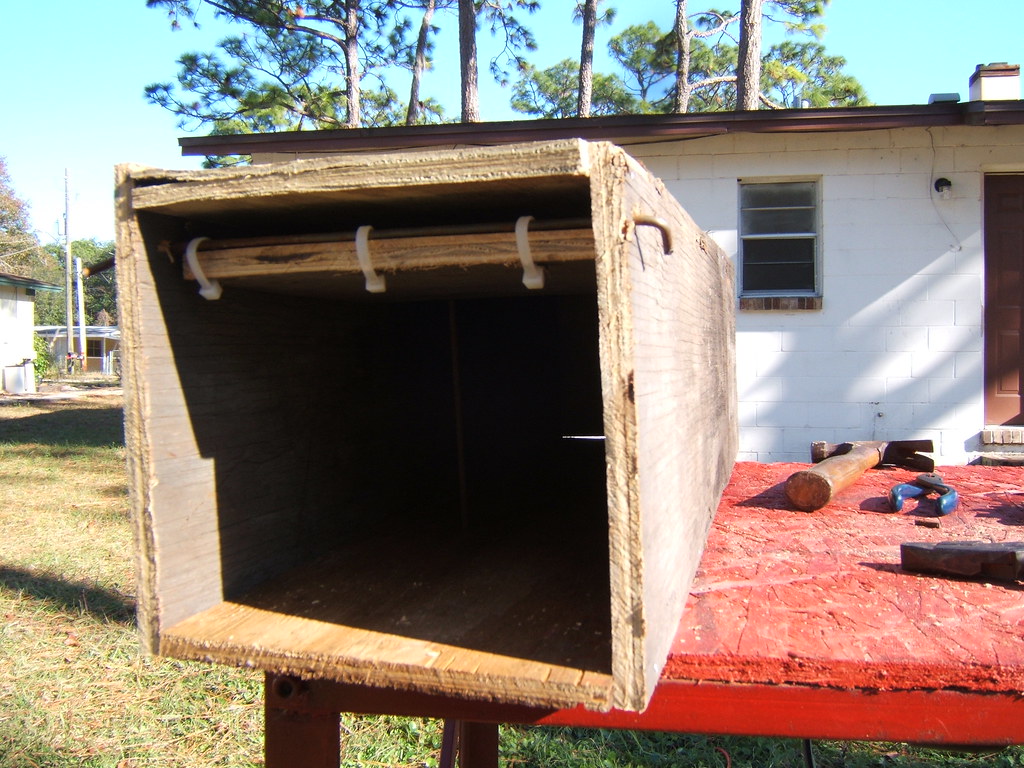
when we tried to catch her. After an all-day hunt, some close calls, and a couple of days waiting for her to find her way into a trap it appears she's gone for good. The wooden box shown is my less-than-stellar trap. Maybe I didn't bait it properly. I didn't even catch a squirrel or raccoon.

I improved the pen with some metal hooks to keep the bottom tight to the ground, but the other rabbit (Dyna) also made an escape attempt; I assume by climbing over a corner. Between myself an my neighbor (thanks Mitch!) I got her back by tossing a blanket over her. My friends Mike and Sabrina got us a new rabbit I've dubbed Trillian and she and Dyna are currently making noise in the kitchen. They only get to go into the pen when there's someone around to make sure they don't cause trouble or make a break for it.

When we first got Trill she Dyna didn't take too kindly to her presence, so I had to 
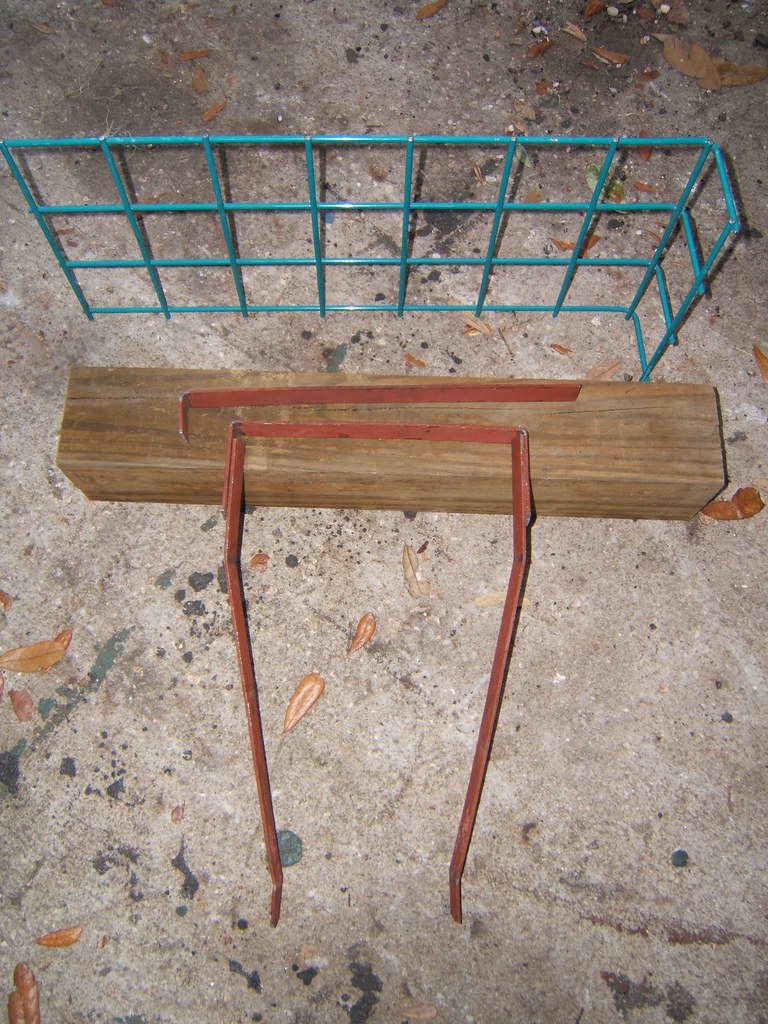
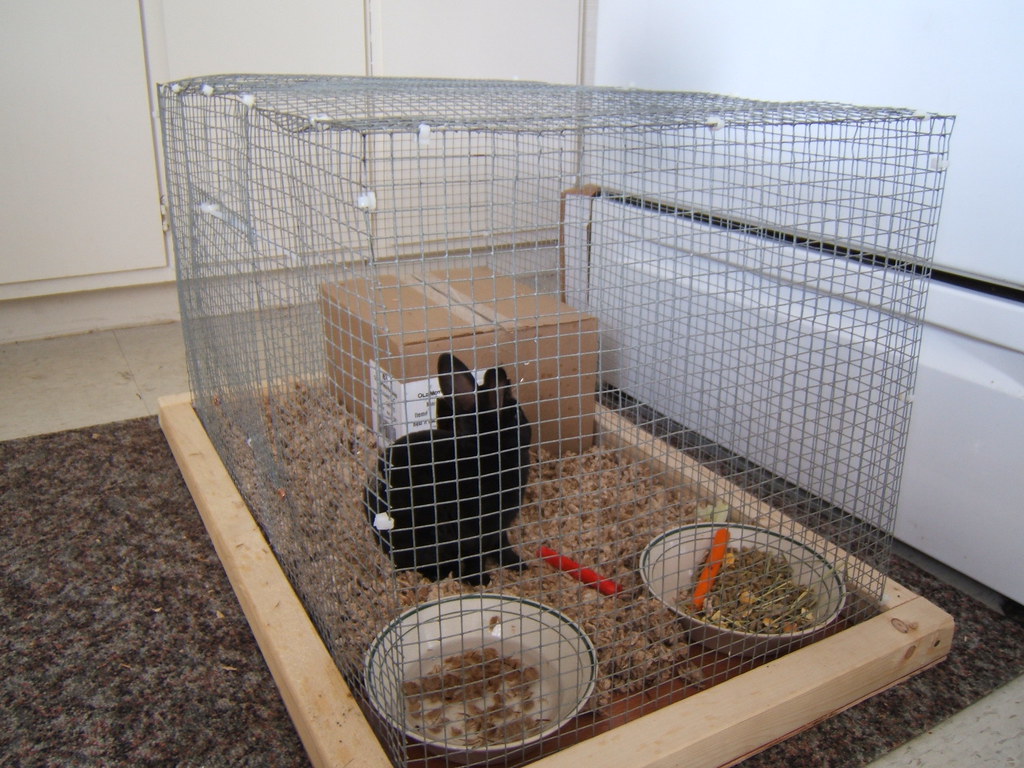
make a separate cage for Trill. I cut some pieces of hardware cloth to about the same size as Dyna's cage, made a paneling and 2x2 base for it, and zip tied the whole thing together. It's not as good as a store-bought cage since she can toss bedding out pretty easy, but it's still nice and she won't need it forever since they'll eventually bond well enough to share a cage.

When they're in the house they need to stay in the kitchen so they can do as they like without the risk of pooping or chewing on things they shouldn't (or which our landlord wouldn't appreciate). To this end I made a couple of bunny gates for the two entryways to the kitchen. One is made from our good friends pre-finished hardwood flooring and 2x2s. That gate is just a couple 2x2s of the same height as the pen with planks of flooring nailed to it with gaps just smaller than the head of a small rabbit. The other is a baby gate Mitch was nice enough to pass my way with an added piece on either side to make it fit the wider of the two entries.

What I've learned is that rabbits need you to either spend lots of money on them to keep them happy and safe or they prompt lots of making things to do those things.

Monday, December 1, 2008

I Made GIFs


A while ago I got hella bored at work, and while wondering what to do with a super-cheap digital camera I had and an Optimus Prime plushie I decided to make a GIF with him. I taped up the camera between a box and a chair and set to work making a stop motion GIF of him walking up, transforming, and rolling out. I bumped the camera once, which kinda spoiled the effect of him doing it seemlesly over and over, but it still looks pretty neat.

I also made another GIF of some coax cable connectors playing Romeo and Juliet. Can't you just see the starcrossed love between them? I forgot which program I used to string the photos together into a moving GIF, but it was pretty hard to find one that didn't require a good bit of skill and didn't plaster a watermark all over the end result without paying for it as you can see in one of the gifs it decided to do. I should have written down the second program I used

Sunday, November 30, 2008

I Made Metal Stick to Metal

I decided to give my new welder a go recently. It's a
small 110v flux-core wire welder and it's pretty handy for anything under 1/4". Anyway, after my dad giving me his old spare set of welding gloves and an old welding mask I struck some arcs and gave it a go.

A few years ago dad had me try welding on a small trailer that needed some work. The results were a "porcupine" of welding wire as he put it, so I figured I'd have to do better this time. After getting a feel for making a few beads on a piece of scrap and burning my name through a piece of thin sheet metal, I decided to try something more substantial. Taking a pile of steel scrap I had around, I fashioned it into an arm that moves at the elbow. While half-way through working on it my roommate ordered pizza and I had to go sign for the it. The delivery guy almost fell over when I walked up with the mask, welding jacket, and one glove still on.

I also made a small metal bracket from some political yard sign metal (the same as the fingers on the arm) for my room mate so his new air filter can bolt up properly and not wear holes int itself. it's pretty much just a rod with a loop on each end welded so a bold could go through.

Once I'd finished the arm and bracket I felt more confident with my welds not falling apart, so I gave a shot at making a work bench. It's made of some metal shipping crate frame that I held together with baling wire while I tacked it together. It's pretty self explanatory to look at it, and sits pretty solidly, but I wish I'd had a magnetic square, as the corners are nowhere near square. Ohh well, it'll still work nicely. The table top is just chipboard and I painted the whole thing so it won't rust or peel too badly. I'm probably going to make it so I can bolt my Skil-Saw to it and use it as a table saw. I'd also like to get a vice mounted to it as well. At the moment the whole thing is just holding up my

Sunday, November 9, 2008

I Made a Robo-Archaeopteryx

Though it's not complete yet, I figured this is neat looking enough to warrant making a post for now. My room mate got an itch to build a model of a P51-D mustang. He coaxed me into getting a model to make as well. I remember making a model or two growing up, but never got too into it since I always knew what I was going to wind up with in the end and they never seemed to give you much choice in variation. I was into Lego though since once you'd made what was on the box you could recombine it any way you liked. I wound up recombining the parts from a kit into some odd things, and figured this would be fun to do with the my models as well.

I got kits for a 69 Z/28 Camaro and a Huey Vietnam War era helicopter. I used superglue to hold it all together, setting out the parts and looking over them for things that might shape together. The times I've made models like this I've never been too sure what I was working toward at the start, and just started to put together larger pieces. What I wound up with was a bird-life thing that looks pretty similar to an archeopteryx, an early ancestor of birds. I'm still planning to add more detail and paint the whole thing, but for the moment it still looks pretty neat, so here it is. There are some more photos on a Flickr set here: http://www.flickr.com/photos/ironleg/sets/72157608803206197/

Tuesday, November 4, 2008

I Made a Bridge and Stairs


Yesterday and today I got an itch to go to the other side of the big ditch behind my back yard, but wasn't able to since the big ditch has about a 12ft wide stream in it with little fish and frogs and all. I manages to score some nice 2x4 lumber and fashioned myself a bridge to cross the gap. It's pretty self-explanatory; two 12' boards on end toenailed to the 4x4s they're sitting on, then planks of 2x4 over those for the deck. On the other side it turns out there's a fire trail that runs about a quarter mile in one direction and about 3/4 mile in the other, with trails to the side leading into the woods. It's a good place to go exploring. After making my little bridge though I decided the incline on the other side was too steep to keep scrambling up it every time I go over there, so today I made some stairs to make going up a little easier.

They're pretty simple, just start at the top, dig out the first step, shoveling the excess dirt down to where the next step will be, pound a line of steaks into where the face of the first step will be, then tamp down the ground in the first step and repeat for the next step. Filling in the backfill with sticks as well as the dirt should hopefully prevent some erosion, and for some of the steps I just put in a few steaks with flat boards behind them. We'll see which type fares better over time I guess. Make sure the steaks are about twice as long as the step is tall to give them plenty of room to hold into the ground without tilting forward.

I was thinking about making the bridge able to winch up onto my side so it's not abused or broken by someone, I might have to re-visit this if I do so. There are more photos over on this Flickr set.

And one more thing. It's November 4th, GO VOTE AMERICA! THIS IS SERIOUS BUSINESS!

Wednesday, October 29, 2008

I Made Some Halloween Stuff (on the cheap)

I haven't updated for a while because I've been moving into a new house, but now that we're moved in and I've got some free time with Halloween coming up I decided it was time to make some decorations. I've got more details over on Instructables. A giant spider web, spooky fence, grave stones, and a dead guy made of expanding foam await you here if you dare. The whole thing was done on a shoestring budget since I'm not one to break the bank for something that'll be up under a week. Enjoy, and Happy Halloween!

Thursday, October 23, 2008

I Made a Skeleton With a Scandanavian Accent


With Halloween coming up and my roommates and I hosting our first ever party, we were looking to do some decorations. I got one of those plastic skeletons in a box, but he was pretty generic other than a rather happy look on his face. Is it a face? I'm not sure. His mandible looks happy at least. Anyway, this reminded us of the key holding skeletons from The Legend of Neil. The other day Bri (roommate and Daniel's girlfriend) got a rather large metal key, with no specific purpose for it in mind. As we had the skeleton though and it seemed to remind us of the show, we remembered the key and decided that he must have been a snarky, murderous, and Scandinavian skeleton who was "gay for deals".

Anywhichwhats, It's a plastic skeleton, a piece of shirt sleeve nailed on as a mustache, a wooden sword taped to his hand, and a hook holding the key in place with a cardboard word bubble. We're debating whether he's a halloween fixture or more permanent.

Saturday, October 4, 2008

I Made My Niece and Nephews Have Fun, and Make Things


I feel it's my duty to pass the spark of taking things apart, hoarding random interesting bits of things, and fixing things that others would simply toss to the next generation. Since I don't have kids of my own yet to pass this trait onto I practice on my brother's kids and their friends. To their friends I'm usually introduced to their friends as "uncle Ronnie, the one I told you makes all those weird things". I'm not sure how many kids I'm not the uncle of I'm uncle Ronnie to. It's kinda cool.

Anyway, on the way to work today I picked up a Razor electric kids chopper from someone's trash. The speed controller and batteries were long gone, but those are always the first things to die in these cheapie kids' rides and the drive train was still there. When the yung-uns came over this afternoon and saw this they wanted to know immediately if I could make it work and if we could do so before they left. It was already kinda late, but when my youngest niece came in and asked I couldn't say no. So I set them all to work helping to get it functional. My nephew holding wires and helping solder, his friend grabbing, stripping, and cutting wires, and my little niece testing that the beefy power switch made it go once it was all together. I used a couple mismatched, but fairly equal capacity batteries I had around for power, and we were ready to go. This was all frantic as it was already past dark and they were worried they'd be headed home at any moment.

We aired up the front tire with my air compressor, grabbed a flashlight for a headlight, and they rode it up and down the dirt road a few times on whatever power the batteries had. They had fun and I also got the chance to teach them about basic electronics, soldering (using my 40 year old 200w soldering iron), the precautions to be taken with big batteries (after shorting together the batteries in loop), and they were really having a good time trying to beat the clock and bring the little chopper to life. It's a squirrly little ride that ought to be on paved cul-de-sac rather than dusty dirt road, but it's fun none the less and I think they had more fun getting it running than from actually running it. We'll see if that changes when I get the batteries to full charge.

I Made an Air Compressor Work Nicely

I picked up an old air compressor that had seen better days from my brother a couple days ago. He'd gotten a larger permanent setup going and didn't need his old beat up compressor so I get the hand-me-down. Cool :)

When I asked what was wrong with it the list was along the lines of "something with the wires, it has a leak, and the gauge is broken." The pressure switch was also MIA, the belt has seen better days, and the whole thing looked rough as a pine cone. Time for a tear-down and cleaning.

I started by running it to figure out the problems since it did run if very poorly. The wiring was a lamp cord wrapped around the motor's terminals, the leak was from the compressor's leaf valve and from the copper feed to the tank, and the guage worked but was way off and sticks on 20PSI.

I took the head off the compressor, revealing a sludge in the piston chamber, as well as all over the two reed valves. Cleaned those up well with degreaser and a razor blade on the reeds, put it back together and it didn't leak there (and added about 10cc per cycle due pumped to not being full of sludge. I tried sealing the bad feed to the tank, but had to cut it shorter and put a new faring on the line, which solved that problem. I trimmed the frayed strands from the belt, oiled the motor, and attached the wires with proper connectors. With this done, I decided to check the crank case oil. This was a scary sight, as there was enough water in the oil to turn it a milky grey, and it was so old when I drained it most of it slowly plopped out for several minutes like grey snot. New oil in the case and it sounded happier while running. For now I'm testing pressure with a shrader valve and tire guage, unplugging the compressor around 100psi. After tightening the wobbly wheel up, I wire brushed the whole thing and painted it up. I also added a handle to make it easire to handle from my small blue pressure tank.

That "ka-pook-ka-pook-ka-pook-ka-pook" of an air compressor is a nice sound. Especially when it comes from something that was otherwise destined for the landfill. I know it might look a little rough now but by comparison to when I got it it looks great and runs fantastic. I expect this little thing will keep me in inflated tires and filled potato guns for as long as I like.

I Made a Really Big D20


While showing a friend of mine some of the things I've made recently he asked me if I could make a big D20 (a 20 sided die used in some tabletop RPG games). We tossed around a few ideas for it and it sounded pretty ambitious since I didn't know the angles I'd need. I got a couple pieces of poplar 1x6, cut them into 20 equilateral triangles, put did some test cuts with a table saw until I got the right angle to put on the inside edge, and then had all the pieces done.

To attach them together used masking tape to put together 3 sections, the top, bottom, and middle belt, and used wood glue to hold it together. While the glue was still wet I put the three sections together, then balanced a weight on top to press the pieces together for a tighter seam.

The numbers were printed out, cut and taped in place. Then I used a square tip screwdriver to punch them into the wood and painted each number with model paint. After three coats of wood stain it was all done. You can see photos of the build on this Flickr set.

Tuesday, September 30, 2008

I made some LP baskets


Since the dairy industry did me the diservice of changing the shape of milk crates to not hold LP records properly before I was born, I've never been able to just pick up a crate to keep my records in. The cheapo bins from Wal-Mart are fimsy and I wanted something better but didn't feel like messing with replacing the flimsybin enough to make something.

Then yesterday my stepmom mentioned wanting a bike basket after seeing my bike rack. I made one out of the same blue news stand mesh, 12" by 9". When I brought it inside and set it down by my record collection though I realized it was the right size to hold records. I had to make more of these to keep my LPs in.

The construction is pretty easy. Cut out a lopsided or even sided T with at least one dimension of the middle being 12". then fold, beat, and bang the sides up and into place, holding them down with zip ties for a little extra support. They turn out nice and hold about 50 records each. I made a full out Instructable here. It got featured on the Instructables homepage, kinda neat to have happen.

Since I commandeered my stepmom's basket (the initial one) I made a couple more so she'll still have one.

Saturday, September 27, 2008

I Made a Nice Rack

For about a month I've been riding my trusty, rusty, occasionally crusty bike around wherever I can. Gas is expensive and the exercise is good for my knee. Only problem is while on it I didn't have any way to carry things short of a backpack. While that works pretty well it does put extra load on me, which got me thinking about this nice rack a girl at FCCJ had. Not that kind of rack. Her bicycle had pannier cages. Moving on.

I went looking around and found the pannier style racks her bike had were too too big for what I usually need, and since I take great pride in the lacking looks, but smooth and easy ride of the bike, I decided to see what I could scrounge up. A little dumpster diving here, a little salvaging of some steel stock from my part of dad's materials junk pile and a handful of various mismatched nuts, hose clamps, and bolts from the garage and I had all I needed to make a bike rack.

The construction is pretty simple once you free your materials form their donor sources. I used the vice to bang the upright arms, U base, rack deck, and frame support (my terms) into the shapes I needed, drilled holes in the proper places (all eye-ball, not a measured inch on the whole thing), then bolted and clamped it all together. I tell myself the totally mis-matched fasteners are there as a means of keeping it from being stolen since you'd need the better part of a tool set to get the whole thing off of there. I had to cut a small chunk out of the front left and right since standing upright could let you bump into those parts, but this didn't impact carry capacity.

I'm very pleased with it and I'll probably give it a decent wire-brushing and a lick of paint when I get a chance. That or I might just leave it as-is for now.

Update 1:
I've gone ahead and painted the rack, it looks much nicer now and I've also made a pretty detailed set of instructions for it over at Instructables.com

Saturday, September 20, 2008

I made a box

Simple simple simple. I salvaged some 1x4 plywood planks that were broken from around my work, cut the broken ends off and cut the four odd lengths into as many 1' lengths as I could get. I put together four of them together as a frame, then screwed the extra ones onto the bottom, cutting the last one thin enough to not hang off the edge.

To finish it I went with a little rasping and sanding to smooth the edges and mask slightly unsquare edges and used a propane torch to add some age to the box, burn off the little flaky bits, and seal the wood a little. It's also a decent faux-aging since it already looks like something they don't make like that anymore. I dunno what I'm planning to do with the bugger. Any ideas? It's really strong, I guess it would make a good soapbox to speak from.

Thursday, September 18, 2008

I made another ray gun (and a new term)

A couple of friends of mine are going to an anime convention in Atlanta this weekend, and were wanting to do some steampunkish cosplay. They were looking to have some props and pieces for their costumes, so I obliged and made up a new ray gun.

The construction is pretty obvious, I pretty much just took a look in my junk bin and pulled out anything with a neat coil or old looking electromechanical component. I wound up soldering a copper pipe to the shaft of a vacuum motor core. Then, using pipe clamps I mounted that to a pull saw handle. I attached the other bits with super-glue, some more soldering, hot glue, and adding magnet wire where it looked necessary and what you see below is what I wound up with.

It's pretty hefty since it's got so much steel and copper to it. I was originally going for steampunk, but since I didn't have much copper or brass on hand, but did have plenty of coils and simple but chunky electronics on hand I went with that and I've decided to further splinter the "old looking things that look like more modern things made with old technology" movement and dub this a Teslapunk death ray. It's not quite Buck Rogers looking enough to my eye to group it with that time, and the round motor core on top kinda looks reminicent of a revolver. My original plan was to have there be a button and battery to trigger the solenoid so there'd be some motion to it, but since they were headed out I decided to put further additions off for the moment. Maybe I'll add that and some sound effects when they get back.

Tuesday, September 16, 2008

I made something to clean rust

I was reading a post on makezine.com about electrolytic rust removal. The setup described called for rebar, washing soda, a battery charger, a bucket, wire nuts, wire, and several other parts. Looking over the whole thing though it seemed like the whole setup just needed the charger (or any low voltage, decent amperage power source), an electrolytic solution, the metal to be cleaned, and an anode which could be any conductive metal. I wanted to test it out as cheaply as possible to see how effective it could be without making a big to-do about setting it up.

My materials were as follows:
Salt (1/4 cup or I just poured til I felt jazzy)
Water (the wet kind, not the solid kind)
Baling wire (cheap, metal, and flexible)
6-12v charger (anything more than 10 amps is serious overkill and won't work any better)
Bucket (which you should always has)


Setup is pretty simple. Fill the bucket with water, mix the salt in well, bend a piece of baling wire so it sits in the water down to the bottom of the bucket in a couple places. Next attach the + (red) charger cable to the baling wire and the -(Black) cable to the piece you want cleaned. Set the peice in the water (fully submerged is preferable) and plug in/turn on your charger. You should start seeing bubbles within 30 seconds on both the submerged wire and piece. My scissors bubbled more on the side with clamp because the joint in the middle doesn't connect them terribly well I guess.


After leaving the whole setup in a well ventilated place for about an hour for smaller things, more for larger, you should be able to take a wire brush to clean off any remaining rust, then redipping any parts that weren't under the water before. You can leave it in longer, but I was happy with the results I got with about 1:30. Taking a wire wheel, wire brush, or steel wool to clean the whole thing and then keeping it either clearcoated or covered in light oil will prevent further corrosion. Shabam!, from rusted solid to ready for re-sharpening in an hour and a half. I need to hit up a flea market and get some rusty but awesome old tools to do next.

Friday, September 12, 2008

I'll Make an SOS to The World

I made a message in a bottle to send out to whoever might find it. I used some Faux aged paper I made a while ago by dipping heavy stock paper in coffee and wrote out a letter on it. I'll put it in a wine bottle, seal the end with wax and a cork, and chunk it out to sea. Here's to hoping someone finds it and emails me back since I left a finder's log with my email address on it.

I also went ahead and printed out the lyrics to "Message in a bottle" by The Police to toss out in a bottle as well. I figured it would be a funny thing to find in a message in a bottle. I'll update with pictures of tossing the bottles as well as if anyone replies to them. Who knows where they might wind up?

Thursday, September 11, 2008

I Made Steampunk Goggles (Just like everyone else!)


For some time now I've been meaning to get or make a set of steampunk goggles. While they are a staple of the steampunk scene and one can't be expected to properly pilot an aerodrome or keep a boiler properly tuned without a set. I didn't want to make some that were overly simple or shell out the money for a set of brazing goggles. I also wanted to make them from fairly common materials so that others could build on mine if they like. Instructables.org has several 'ibles on how to make various sets of goggles, but when I saw this one I knew I could make it work for what I wanted.

Instead of using a baseball I went with a softball. I didn't really want to spray paint Gatorade lids for eye pieces so I walked around the hardware section of [Big-Blue-Box-Store] and found some brass-plated door bumpers that looked just right for the task. I also decided that elastic would make for an easier headband than rings and painted denim.

The whole process is pretty simple. You cut the stitching off of your softball until you've got one of the peanut shaped leather pieces, then cut that in the middle. These will be your left and right sides. Color them black or dark brown (I used a big black permanent marker, paint works too). You cut a reticle-like shape just smaller in diameter than your eye cups (door bumpers) and super-glue the tabs to the inside of the eye cups. After that you can super glue or hot glue round clear plastic (plexiglass or that impenetrable packaging plastic works well) into place as the lenses. Sew the middle together slightly above center, then sew the elastic band on the ends.

You're now one step closer to a becoming a proper ornithopter test pilot. Just remember that goggles alone do not steampunk make. One must come up with other creative re-imaginings of the contrivances of the contemporary with the contraptioning of days long gone.

These goggles were actually the second set I've had a hand in, with the first being for a friend, I just made these from the leftovers and extra bumpers. His look almost exactly like mine, except I hot glued my lenses in place.

I made a solar light for the dock

Since my dad had a big extension put on our dock, he's worried that someone might come around at night and hit the end of it. We didn't want anything too big or wired out there, just something to mark the end of the dock at night. As I was cleaning up around the dock after tropical storm Fay came through and flooded out the back yard, I noticed that it had broken and washed up some of the solar walkway lights near the waterline.

After a thorough cleaning and repair to a broken trace on the charging circuit, I managed to get one of these lights working again, but the housing for it was too cracked and dryrotted to be of any good, which is OK since those things always looked like butt anyway. I found a candle holder that had stained glass on it and it happened to fit the solar light just right, so I hot glued it in place after charging the batteries and went looking for parts for a base to hold the new light fixture up.

The storm also blew and washed in plenty of other good flotsam as well, including some barnacle covered but still sound 2x6 boards. I sent them through the saw and nailed them together, then used some salvaged drywall screws to hold down the light. After this I took it down to the dock and screwed it in place while hanging loosely onto the end pole of the dock. With the barnacle spots it looks pretty cool, the whole thing didn't cost one red cent, and we don't have to worry about errant boaters denting the dock with misdirected dinghies.