Thursday, May 29, 2008

I made a chair


Some time last year I was having a bad day, and usually when that happens and there isn't much to be done about it I try to do something to occupy my time and my hands. I'd just gotten a pull-stroke hand saw and decided to try it out in the back yard. I started by cutting down several saplings toward the back of the yard, not sure what I was going to do with them. As I built up a nice pile of straight-ish sapling trunks, I decided to try making a chair out of them. I cut them to length, make the front, then the back, then joined those, all with wood screws. Some of the wood was very soft, so as that wood split a lot, but it still held up fairly well. I split some sections of the wood down the middle and used those as the seat and added some diagonal pieces to make the whole thing more stable. It's not as large or comfortable as a normal chair, but that wasn't really the point of it anyway. I had to add some zip ties to hold together one part in the back that split when I was using the chair as a stool to stand on, but other than that it's dried out and held up pretty well. I'll probably make a better one some time with pre-drilled holes and dried wood. for now, this one lives in my dad's gazebo. My grandma always prefered to do something productive when she was mad, and I'm glad to say I think I picked up that trait from her.

Sunday, May 25, 2008

I made an arcade game cabinet

A few years ago I got into old arcade video games. They represented a time that I wasn't a part of which seemed to have it's own story with dimly lit caves full of kids and teenagers who were free to roam around and try their hand at besting rows of machines that would entertain and cast a cool light over their faces until the quarters were gone and their three initials had been etched into the game's record of heroes. It seemed (and still seems) a shame to me that these places of social video games are slowly fading away, and I wanted to have a part of that time. I looked into it and found that much like home video game systems like the NES, Sega Genesis, and Atari have been translated into programs that emulated their games for modern computers, arcade games have much the same thing going for them with a program called MAME (the Multiple Arcade Machine Emulator). I was able to not only play something similar to those original arcade games, but actually play the originals, their code and idiosyncrasies pulled straight from their original game boards and loaded for me to play on my PC, even down to having to press a button to "feed" the game a quarter.

For a while this was very interesting and fun, but it still wasn't the full experience of standing in front of a real arcade machine and mashing buttons and joysticks. I looked into MAME's community more and found that there were already many other people, maybe hundreds, who had the same want for a full arcade machine in their home that I did, and thanks to the Internet, they had gotten together to share stories of how they made it happen and what they did along the way. Some people had gotten old arcade games and fitted a computer to the original screen and joysticks; others had started from scratch and build their cabinets, ordered brand new controls to use in their machines. Some had used old keyboards and PC joysticks with a rat's nest of wires connecting everything while others had come up with or used very professional looking, very clean machines that were custom designed for their purpose. Many people had created huge four player behemoths that have every controller from every arcade game one could imagine while still others had created coffee table sized machines that were best suited to earlier, more simple games. I was hooked on the idea of having my own.

I poured over every instruction page, build log, and relevant site I could find, trying to figure out the best way for to go about bringing this idea to life. I slowly collected parts that I thought would be useful and saved my pennies for either buying a gutted/dead game or buying the materials to build my own. I happened upon a dealer at 
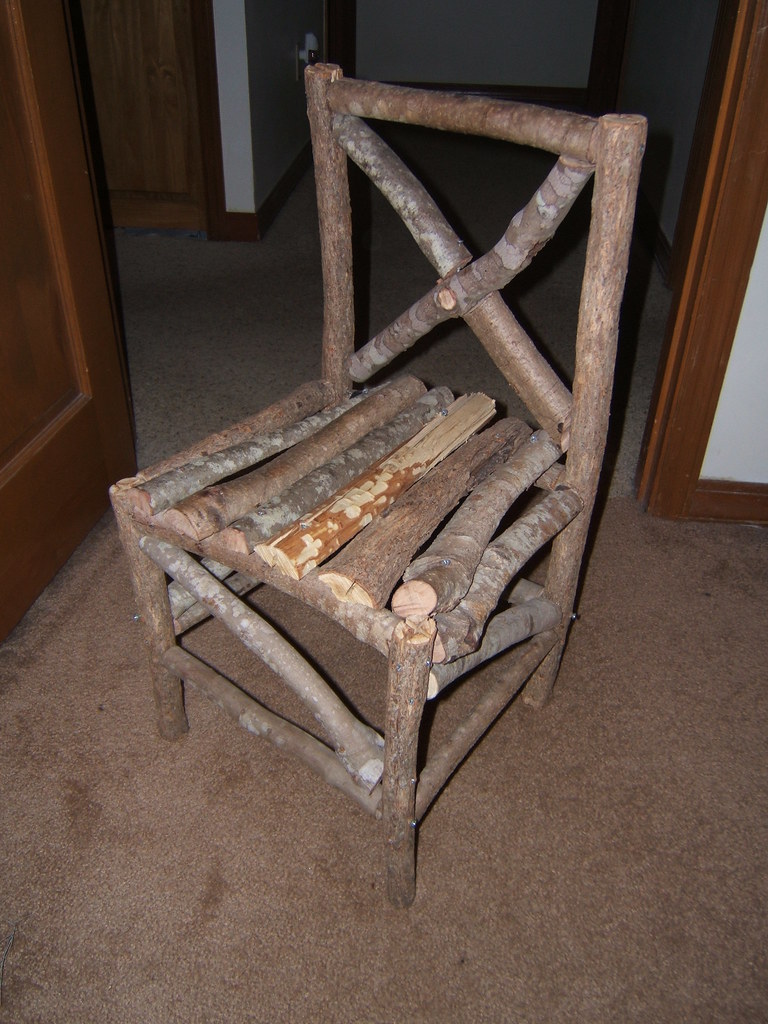
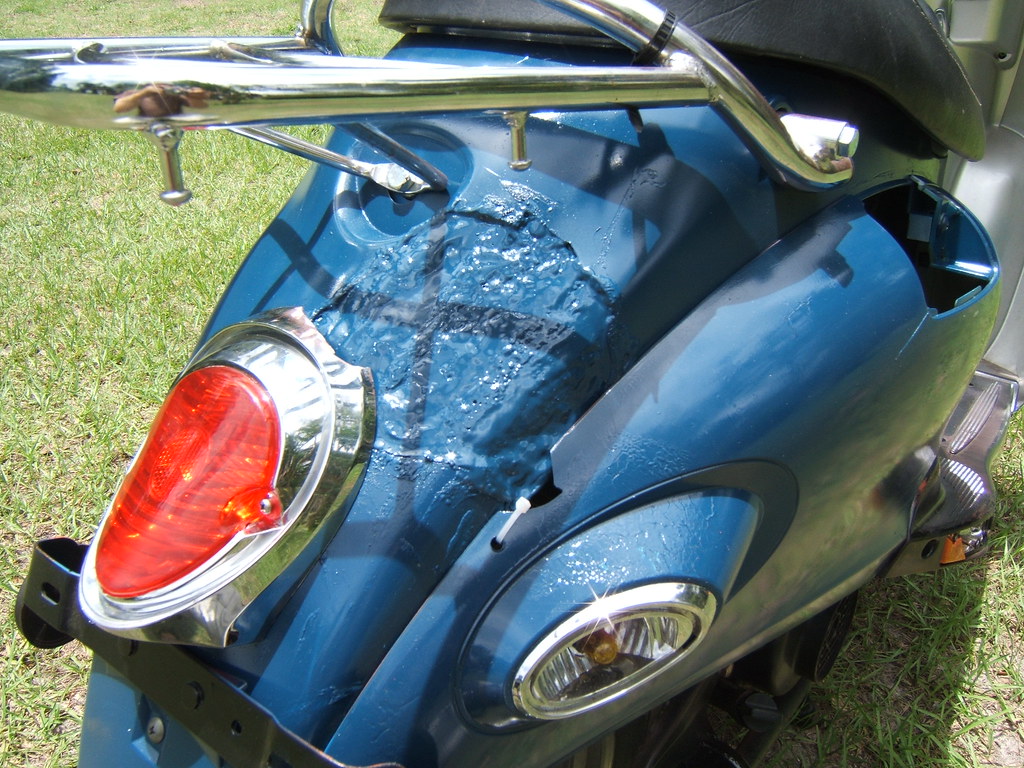
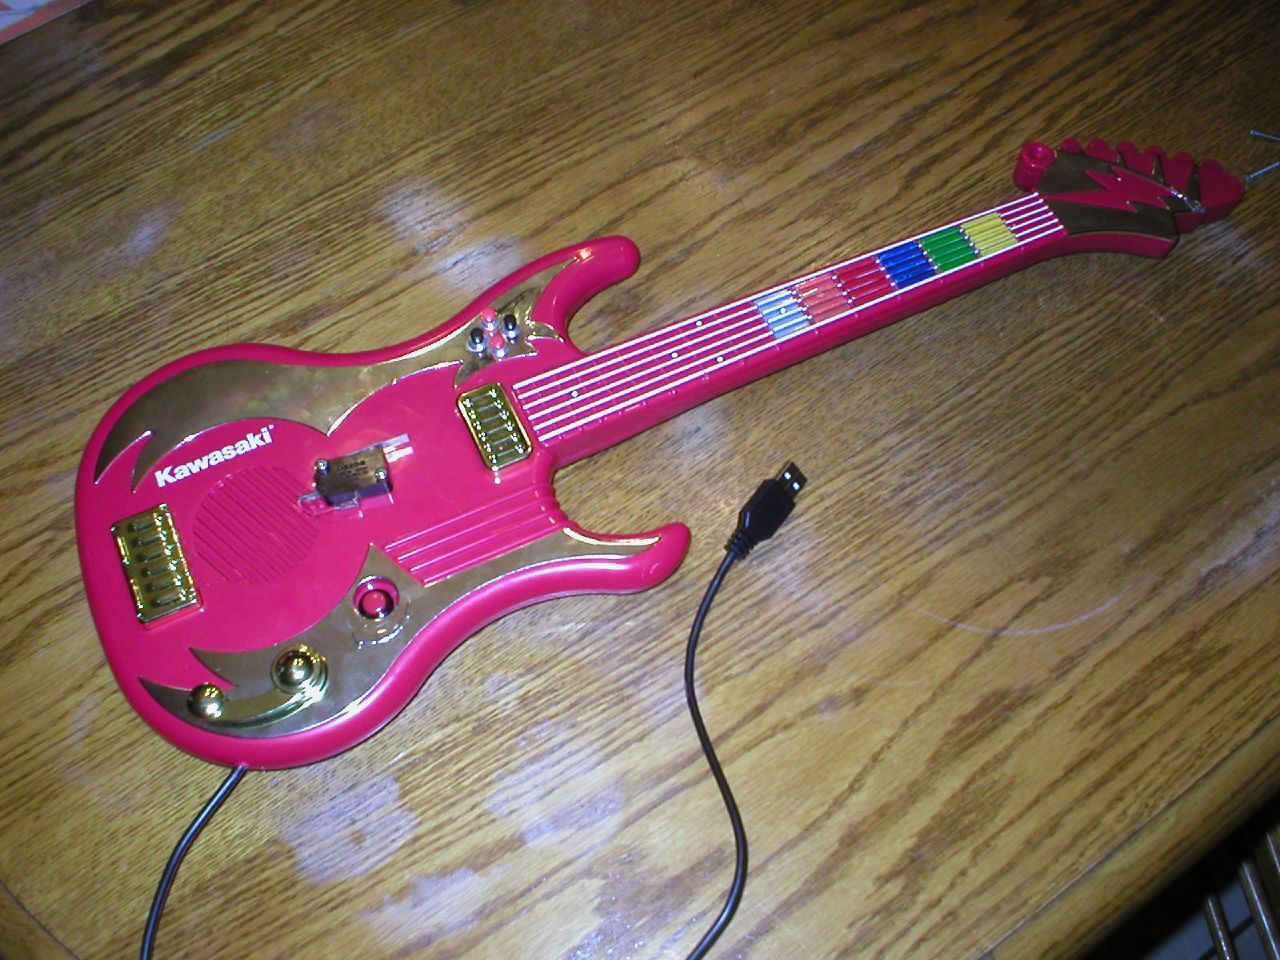
the local flea market who sells video games and used to work with arcade games. He had a few boxes of old controls which I bought, along with a marquee panel for 
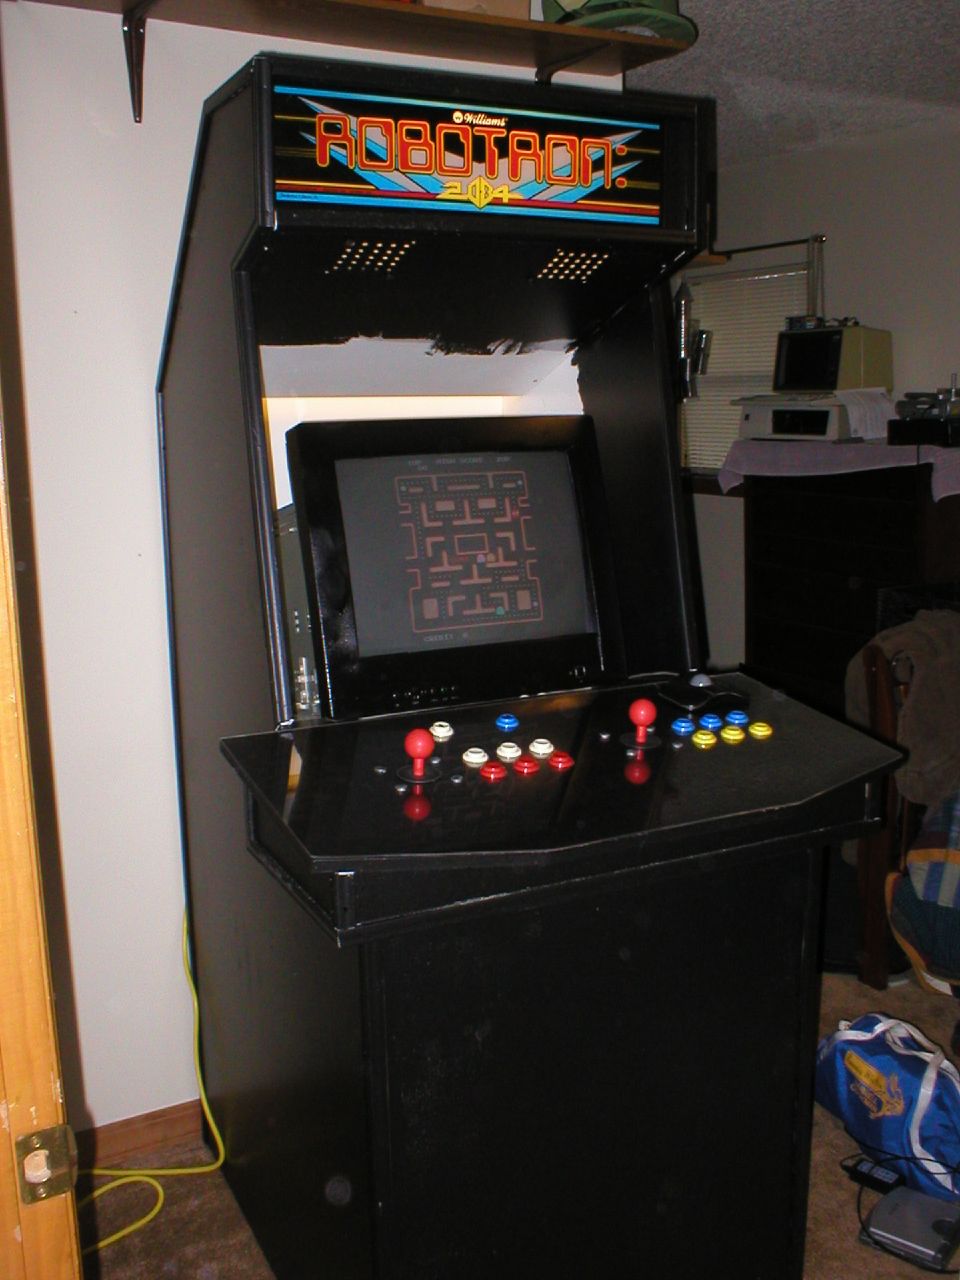
Robotron 2084. Most of these had 20 years worth of grime, grunge, and cigarette burns from having spent as much time in arcade games and parts bins. I managed to salvage and clean enough controls to get a full set of control for 2 players. I still didn't have a cabinet to put them in though.

After a false start with someone on eBay selling me a cabinet for cheap, but refusing to ship it, I decided it would be best to build my own rather than wait to happen upon one locally. I decided to go with a design called LuSiD's Arcade Flashback. It's large, and gave plenty of room for the needed parts, as well as being fairly simple to construct. A friend of my dad who's a fantastic carpenter helped me construct the cabinet out of Melamine backed MDF. It's a type of particle board often used on counter tops, and was what many people used for their cabinets since it's got a nice smooth surface. The problem was that it's hard to work with. You have to pre-drill all holes and glue all screws and seams together or you risk the materials breaking apart. It also weighs a ton and has nice sharp edges, so any time it would slip it would cut me. With the help of my dad's friend these concerns were minimized and in the end the cabinet went together as planned, with a few additions such as a piano hinge on the control panel to make adding controls easier down the line and a slot for the marquee to slide into so that I could easily swap it later if I wanted to. I had construction photos for the cabinet, but they may be lost to the digital sands of time.

Now that I had all the major parts ready, I began putting things together. I cut a clear plexi cover for the control panel and mounted the controls, wiring only one side since I still wasn't sure how I was going to set up the second set. Then I scrapped together a computer from my parts bin and set the huge 19" monitor an uncle had given me in place only to find out the case was too large for my cabinet. I removed the plastic case over the screen and that made the clearance just right.

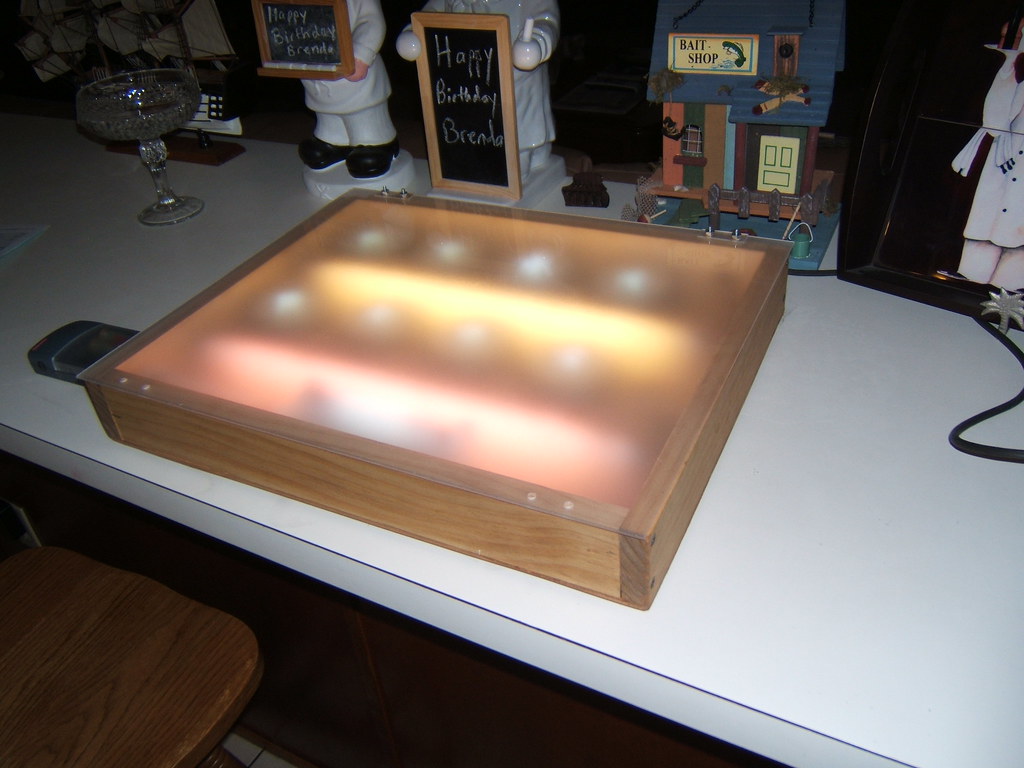
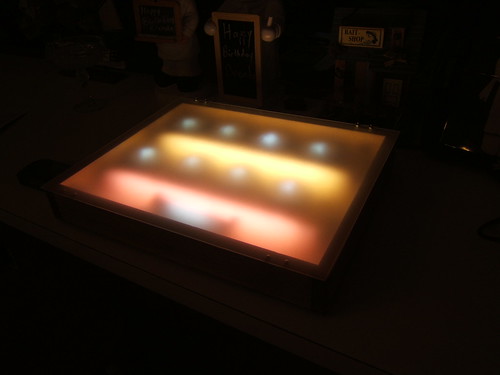
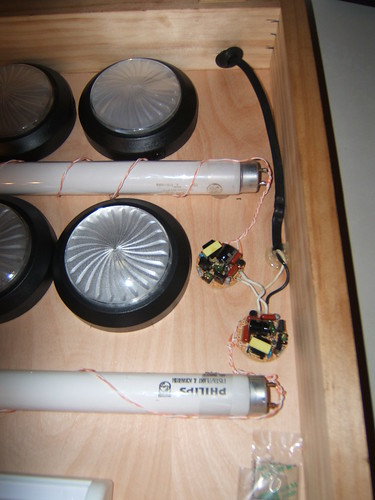
Once I got the cabinet up and running in a basic sense it sat unfinished for some time until I got the urge to work on it more. This time I took it apart, painted everything one cold morning, and then rewired the controls, this time hacking up a USB game pad to allow me to wire all the controls, though I left a few of the P2 buttons unfinished. I also added a large Donkey Kong decal to the side so I would have some side art rather than a blank black cabinet. For a marquee light I used whatever I had most available. At one time that was a nice florescent lamp, which was later repurposed, giving way to duct tape and a desk lamp, which I didn't like the idea of after a short while. I replaced that with a florescent tube powered by the driver circuit from a CFL bulb. This idea later became the idea I also used in the lightbox a friend and I made.

That was how the arcade cabinet usually went for a couple years. I'd work on it once in a while, slowly scrapping together better pieces and a better computer, but it would generally stay in some state of disrepair and general untidiness. At one point another uncle of mine, knowing I was working on this, brought me a very beat up, damaged, and barely working N.A.R.C. cabinet, from which I finally got a coin door to put in the cabinet as well as some other working parts. I'd snag a part from the computer to feed another project or the control
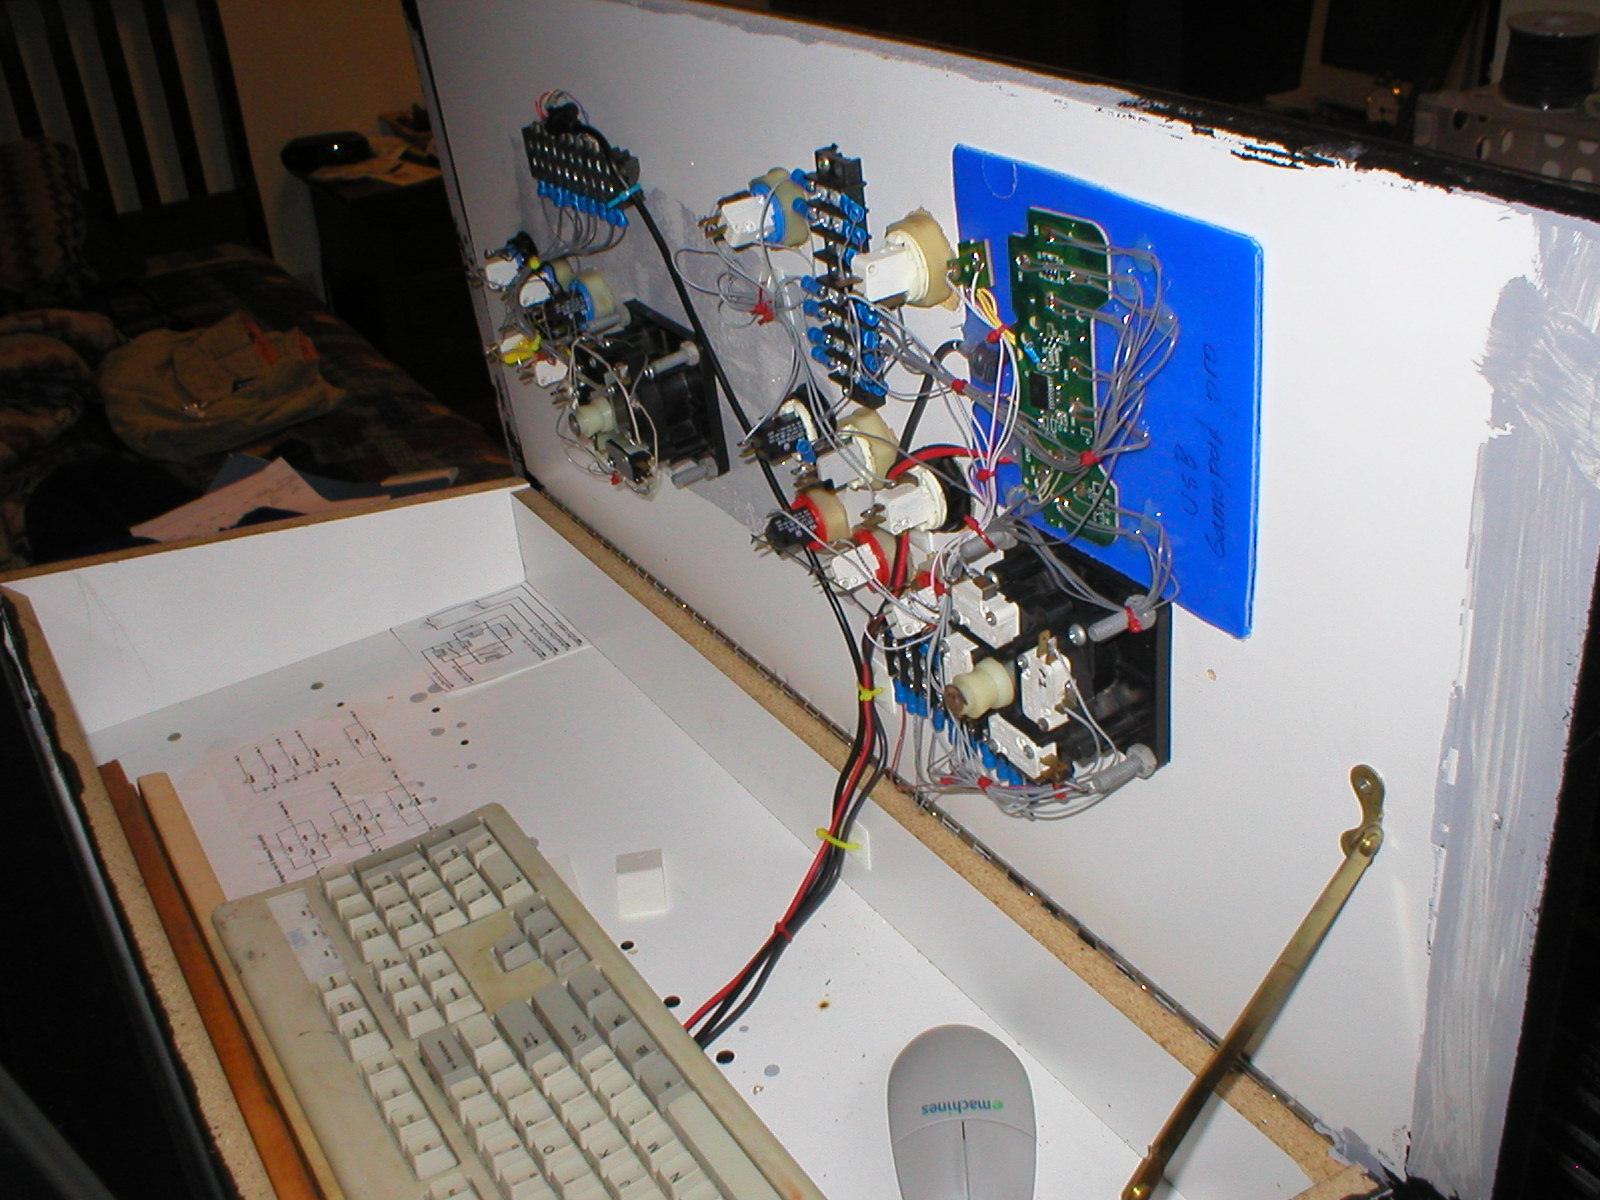
s would snag a loose wire while playing and kill one or more buttons. Eventually I got tired of such things though and decided to fully finish it. I wired all the controls properly and cleaned up the rats nest that had developed beneath the control panel, made a bezel to go around the screen and shroud the less than clean paint job behind it, and set up MAME with a pack of several thousand games and made sure the settings allowed you to control as much of the system as possible with the arcade controls.

Everyone who saw or played with the cabinet liked it (especially when it was working properly), but since I'd had it a couple years now and I'd long since appeased my bug to have a full-sized arcade machine I started thinking about how much I needed the space the cabinet took more than I needed the cabinet. I also felt somewhat bad for having it and using it as little as I did since the time I first got it going.

I posted the machine on CraigsList, hoping to pass it along to someone who would get more use and fun out of it, and after letting it sit for about a month, a kid about the same age I was when I started looking into MAME offered me more than I'd ever put into the cabinet (not counting labor time of course). I was happy to see it move on to someone who would get some fun out of it, and it seemed like it was passing full circle since before the kid (I say kid, he wasn't more than 5 years younger than me) and his dad left, I heard them already talking about how big it was and trying to figure out how to find somewhere to put it; a discussion my dad and I had when he first saw how large the empty cabinet really was.

It was really an enjoyable project, and I really learned a lot about wood working, electronics, soldering, how things like video games were made in the past, and how computer interfacing could be done. I might get a taste to make a newer machine some day, but it would definitely be much smaller (something that could fit on a counter top) and likely be made of normal plywood. If anyone reading this would like more information about this machine or anything related to it's construction, please leave a comment. I'd love to be able to give back to the community that helped me make a piece of video game history come to life for me.

Tuesday, May 20, 2008

I made a light box (with help)


My buddy Daniel was wanting to make a light box for his girlfriend since she's quite the artist, but has until now lacked the ability to properly back light her drawings as she makes them. I'm not much of an artist in that regard so I'm not familiar with how back lighting helps one draw but apparently it does. So Daniel and I decided to make her a light box.

We roved the local Lowes for some materials: an oak 1x2, a sheet of thin plywood, a sheet of clear plexiglass, some hinges, and some small LED tap lights and small fluorescent lights from wally-world next door.

Though we were both very tired we managed to cut the wood and paint the clear plastic with a frosting spray to help diffuse the light, and assemble it all into a working (if dim) light box. He presented it to her the next day and she was very happy with it, but since we were tired while making it there were some rough edges and the spray on the top panel was somewhat splotchy. I picked up the light box about a week later and use an extra sheet of plexi we'd gotten and sprayed it on a flat concrete surface since the fact that the first sheet was sitting on top of a milk crate somehow left the impression of a milk crate as the spray dried, possibly due to heat differences in the sheet. I also sanded and stained the box, as well as putting some rubber feet on it.

I then went about making some more powerful lights. A while ago I used the driver board from a burnt out CFL bulb to power a normal fluorescent tube, and was quite pleased with how well it worked, so I'd been saving any CFLs that had burnt out around the house as well as a few tubes that I'd had for a while. I put two tubes together and hot glued them into the box; it was much better lit now, even though one tube was more purple than the othter X(.

In any event, the light box works well and looks good now, and though I'm not sure what the use of it is, I am sure there is one and it appears that Daniel's artistic girlfriend is getting use from this box with lights they call a light box.

I made some small things

Not everything I make is big enough to warrant it's own post, so here are some smaller thing's I've made.

The first thing I made was a 15 foot long rope made from smaller rope I braided together after a rope twisting tool I made couldn't hold up to the tension it needed to.


The next thing is pretty usual, an omelet I made with BBQ Vienna sausages up at my family's hunting camp when I went there to get some alone time last summer. It was my first omelet and I was proud of how well it came out. Very yummy.


I also made an "LED tree" from a couple of dead AA batteries and a pile of old green LEDs. It was a pretty neat little toy and stayed lit for a couple days on batteries that were pretty well dead. for any other use. I guess the batteries being drained so low already was why the LEDs didn't burn out without a resistor in the circuit. Organically shaped circuits are fun.


Santa's little helper here was a result of an old dead VCR and a slow Saturday at work. He's made from various components off the VCR's circuit board and the Christmas tree is made from the board itself along with some wire and LEDs. The light at the top actually lights up off a 9V battery.


That's all the mini-makings I've got for the moment. I guess I'll toss up some more after I snap some photos of more of my smaller projects. TTFN

I made a rake (and made a Zen garden look nice)

I took a couple classes at FCCJ's South Campus last semester and while wandering around before class one day I found that there was a Zen sand garden that seemed to have been left unkempt for some time. I took a stick and drew out some broad lines in the sand and smoothed out the footprints, but it didn't look terribly amazing. After I got out of class I remembered that I'd found some thick walled bamboo rods discarded in a wooded pathway on the campus. I went there and got a few pieces, bored some holes in one piece with my knife, put some small sticks into the holes, and tied the whole bit to another, longer piece of bamboo for a handle. I'd made a very flimsy Zen rake.

I used it to go over the garden again, but it fell apart just as I finished, so I triumphantly walked back to my truck with the head of the rake dangling precariously back and forth so I could take it home and improve on it.

I wound up drilling out the holes for the tooth pegs, adding some extra supports, and sanding the bamboo. I used some bungee cords to hold the supports in place while the glue dried. It looks pretty nice and fairly authentic, though it's about twice as wide as a traditional rake. It lets me finish twice as fast, sometimes you don't have hours to meditate and rake sand between classes. I was pretty happy with it and it gave me something relaxing to do while waiting for classes. I also trimmed up the overgrown bamboo and trees around the garden. I did this for a while, but eventually had to use some Shoe Goo to attach and coat the corners of the supports so the wood glue wouldn't get re-softened and come loose.

I wound up getting tired of having to carry the rake around and eventually decided to leave it in the garden so I wouldn't have to carry it and so others could make use of it if they wanted to. I gave the whole thing a good coat of clear lacquer so it would last longer, wrote "Please return when done." on a piece of pipe, and put the pipe and rake in the garden. I left it the last day I had class for the semester, I wonder if it'll be there when I get back. Anyway, Here's a picture from right after I started raking the garden, I've got more here.

Monday, May 19, 2008

I made a deal, a friend mad, and a scooter run

I troll around Craig's List pretty regularly. A few days ago I saw a listing for what looked like a Chinese scooter that had an orange and blue paint job. Here's the listing's body:

"I have a XING DUO scooter that is NOT RUNNING. I repeat NOT RUNNING. It ran great for about 6 months after I bought it used and then just stopped. Could be somthing really easy to fix, but I dont know. I dont have the time to deal with it. I took all the body plastic off and sold it. I have some of the original stuff that I took off when I first bought the scooter, but its not in the best shape. You can buy the fairings on ebay for about 100 bucks or so. EMAIL me if you are interested, and give me your BEST OFFER! I do mean Best offer, I just want to get rid of this thing!! Here are a few pictures......"


I offered him less and got it. Once I had it I couldn't find any name for it's model or manufacturer on the scooter or the title. It turned out the paint job was a pretty heinous spray paint job and almost all the body panels and seat had broken parts. I was still happy with the purchase though since those are just cosmetic and the engine looked to be in good shape. I saw it didn't have any gas, and the battery was dead flat (not uncommon for inexpensive Chinese scooters and bikes). I started by taking the battery cover off only to find out that the negative battery cable had come off the connector to the battery, An easy fix and possibly why the scooter "just stopped working" for the previous owner.

After that I had to head to work, where after several hours of research and a tangle of companies, I found the most likely suspect for the manufacturer: TANK, model Classic 50. There are a few differences, but this looks like it's mostly the same. Schwinn and others also sold the same model under other names, but it looks like TANK is the original make.


Today I cleaned the scooter up, repainted some of the parts that had caught the ugly brunt of the spray paint, and tried to get it road worthy by fixing the body plastics as well as is prudent. I wound up epoxying a piece of plexiglass into the back fender and screwed another into the bottom of the seat to make them hold ogether better, as well as using plenty of epoxy on other pieces. After that, I reassembled the whole thing, bending warped frame pieces back into place and figuring out how to keep what's left of the body plastics together. It didn't look good, but it didn't look bad either, and it was all pretty sturdy.


I filled up the gas tank and decided to try and kick start the little blue and orange monster to life. Turn the key, hold the brake, turn trottle a little, kick, kick, kick, kick-kick, *sputter*, kick, *sputter-putter*, KICK KICK, *sputter-putter-cough-cough-broooooooommmmmm*. IT'S WORKING! The only think that was really wrong (other than having the ugly tree fall on it) turned out to be that loose battery cable. And the battery, and the speedometer, and the gas needle, and the odometer (hey, the horn still honks), but the ugly scootling was running and I took it on a few victory laps around the yard to get a feel for how it handled.

Next I took it down the road to the local hardware store (it's so nice when yours hasn't gone out of business yet) and picked up a few bolts that were missing. I had to spend several minutes kicking the scooter to get it to start again. The sun in front of the store was beaming down as if to laugh and delight in wanting me to kick until I passed out from heat stroke, but eventually it started up again. A new battery is a high priority now.

By now it was time for me to clean up some and head to work, where I found this site, specializing in parts for TANK's vehicles. They look like they have what I need, but I'm not sure so I sent them a few photos and asked if they could get me the side panels, back fender, and a seat. We'll see how that goes.

On the way to work though, and while I was working on the scooter, I was talking on the phone with a friend of mine who's very opinionated about motorcycles and scooters, and is of the distinct opinion that scooters are the scum of the earth. Thus my obtaining this scooter is a betrayal of his trust and I'll have to wait until I can break his feet-forward bigotry before I'm fully in his good graces again. C'este la vie. I just had to put it to him as being like a minibike that's street legal for him to give me a temporary stay of execution.

I'll update this post once I get word on the replacement parts, but for now you can see more photos of the ugly scootling on this Flickr set.

(EDIT: 5-27-08)

Over the last several days I've been working more one the Ugly Scootling. Here's an overview of what's gone on.

First the body: I cleaned up the body panels a little to scrape off the worst of the rough spots in the old paint and disassembled all the body panels and things attached to them so I could paint them without overspraying all over the scooter. I didn't bother getting too worked up about imperfections since there's no way I can get the body back to looking new without many hours of work and ordering new body panels. I filled in the large hole in the back fender with JB Weld. I didn't bother making it look too great since if I want to get the scooter looking like new I'll just order some new body panels. At the moment I'd rather spend any money I spend on it on repairing parts like the starter.

Speaking of the starter, I ordered a new one off of eBay last week and it came in today right as I was finishing up the cosmetic work. I bolted it on and it works fine. No more kick starting every time now! The arch of my right foot is happy for that. The only thing that concerns me is that from what I can gather the starters on these Chinese bikes are usually pretty short-lived. I'm wondering what I might be able to do to make sure this one doesn't kick the bucket as soon as it's replacement did....

I also got all of the lights working. The tail light bulb was blown (not even a trace of filament left in it), and the rest of the lights seem to be fine now.

Wednesday, May 14, 2008

I made a robot's head

Every once in a while I realize I've got too much junk. This realization usually comes after I've had said junk for a while and when I decided to toss out a pile of junk, there was a smaller pile that I couldn't bring myself to toss. The pile had some parts from a couple of old camcorders, random motors and lights, an old joystick from an old arcade game, and some buttons and switches.

I didn't want to toss this stuff, but at the same time I didn't quite know what to do with it, but I decided that I'd have to make use of it or toss it. I started looking at two parts, a viewfinder and a lens from two different camcorders and thought they looked like eyes, so I decided to make a robot of some sort.

I carried an old shoe box stuffed full with parts along with some solder and my soldering iron to work and over the course of my shift used the down time to cobble together the robot (or at least it's head) and mounted it to a metal case with the controls.

You can turn the head, zoom the eye inand out, record, and play back up to 20 seconds of sound. Or at least you could. A few days after I made it the little guy took a dive off a counter and was "rapidly disassembled" by the floor. I decided to put it back together, but the sound recorder doesn't work now. ohh well, something to work on another day. I'm just glad that most of it survived the fall. I also used much more hot glue to hold it together this time.

Tuesday, May 13, 2008

I made a bookshelf


I needed a book shelf for a very large amount of hardbound National Geographic books I got free. I made it with a couple nice pieces of plywood and some 2x2. That bookshelf is double loaded now and almost completely full, so I might need to make another one soon. I made it pretty much like it looks like it was made. I attached the sides to the top and bottom shelf, then filled in the middle shelves, and finally attached the back.

I should have made the shelves a little higher so that the books could stack to the ends, but that's okay since the ends still hold most books fine.

I made instructables

A while ago I made some pretty cool things and wanted to share them with anyone who might want to recreate it for their own purposes. Two were light control boxes for a small, not too expensive band light kit, the other was a USB guitar for a clone of Guitar Hero called Frets on Fire. I made directions and notes on how I made these on Instructables. The first was a dimmer based three light controller I call the Band Blinder, the second is a sound driven power trigger I call the Band Blinker, and the third is the USB guitar.


And by the way, the guitar is red in real life. It's not pink :P.

I made a bamboo bow and arrow


A while ago I went to my dad's hunting camp and while I was there I decided to make some use of the small bamboo that grows in one spot behind the camp. I had some flint that another member of the camp had collected, which I practiced knapping into some arrow heads, which is a hard skill to obtain). I must have broken many more peices of flint than I wound up even getting somewhere close to triangular. Eventually I got a few good looking candidates though.

Then I took a page from this instructables page and used some twine I had to bundle together several pieces of bamboo and used some pipe glue that was laying around to glue together the bundles and the bowstring, which I made from several runs of twine.

I then made the arrow from some turkey feathers and a nice straight piece of bamboo. This was especially nice looking when done and when I shot it out of both my small compound bow and the bamboo bow it went straight and about as far as a normal practice arrow. The bow only went about half as far as my small compound bow, but I was still pleasantly surprised at it's performance. Over the next few days as the bamboo dried the bundles got looser and it lost tension, but it still makes a nice piece on my wall.

I'll definitely make more bamboo arrows, and as a result of making the bow I've been on an archery kick a little and I'm working on an oak longbow now, though my other projects have been keeping that on the back burner for a while now.

I made shade


There's a beach not too many people know the location of. It's just a trail off the side of the road that goes about 1/3 of a mile back to a beach covered in dead trees, driftwood, and the occasional peice of junk that's washed up. It's called Black Rock Beach by everyone I know who knows of it, though the name is something of a misnomer, the black rocks are more of a hard rock-like soil. In any event, there's not a whole lot of shade, and I like to make things, so when I went out to the beach a few weeks ago I decided to collect driftwood and make a place in the shade.

The sun was out and burning hot by the time I'd biked down to the beach and as I walked near the top of the beach I saw many peices of lumber I guess have washed or rusted off of people's docks and found there way to the beach on some high tide. I decided since I wasn't going to swim in the still frigid water I would make a place to get out of the sun, a little tiki hut over the side of a half-fallen tree. I gathered any long wood I could find and started to make a nice little frame, but the more I built, the farther I had to go for more material. This led to some interesting wondering around behind sandy underbrush and more than one box turtle giving me an odd look from inside it's den, including the one that I didn't realize my tiki hut was a neighbor to. I called him Yurtle and tried to keep the noise down after I saw him.

I covered the frame with the reeds that had washed up along with whatever else I could find. It was pretty cool in a swiss family robinson sort of way. I like to make things like this so I can tell myself if I ever landed on a deserted island I'd do ok.

I made music (with lots of help)


With the help of my friends Daniel and Justin, I made some music recently under the group name "Anderdown". We're planning on making more as well as practicing some cover songs. We're also trying to get a full band together, so we need a drummer. Any drummers in the audience?

You can get an earful of me singing here: http://www.myspace.com/anderdown. I'm still getting used to the sound of my voice and still trying to figure out how to sing with the songs we're doing, but I think those two turned out fairly well.

And what's with the city? It's a composited image I made of the mythic city of Anderdown.

I made a steampunk ray gun

I've been looking from the edges at steampunk subculture for some time now. For the uninitiated, steampunk is the the idea of trying to imagine what the things we have today or may have in the future might look and be like if they were made with the style and technology available during the Victorian era. If you've seen the movie Wild Wild West or watched the Firefly TV series, these could be concidered steampunk in some ways. I highly recommend watching Firefly by the way.

I love this a la carte re-imagining of the past/future, and decided to make something from this world which never was. I decided that a "Pulse Amplification by Stimulated Emission of Collected Aether" (PASECA) device (A ray gun) would be just the ticket.

Since I don't have many gears (a common theme in steampunk design) laying around, I decided to go more for the look of coils and linkages in my design. I use the term design loosely though since there wasn't any real design. I started by going to Lowes, grabbing an armful of copper and brass odds and ends, going back for a shopping cart, then setting peices around one another until I saw something I liked. I think it turned out quite nicely since I've had no real experience working with copper/brass soldering. I'll have to write up a nice product/spec sheet on some tea-aged paper with a nice pen to go with it. This is what the PASECA device looked like part-way through construction. The hissing sound of quenching hot metal is very satisfying.


Since I wanted the guage on the back to be at some value, I made the tank it's attached to air tight and added a tire valve to it so I can have it really hold pressure. I've also added some leather to the front of the handle as a better grip. Without further Adieu, here it is:


Next time I make something steampunk-like I'd like to make it with more brass, which is a much easier metal to solder to than copper, but they're both expensive as heck right now so I'll also be putting off the next project until I get enough scrapped dodads together for at least most of it.

And Here's a photo of myself with the ray gun in somewhat Victorian garb. I need to finish my goggles....

I (re)made a guitar


Starting about 6 months ago, my nephew was getting into playing guitar and was showing some real promise and skill. He already had a couple, but really had his eye on a red Gibson SG. Being as I didn't have the 1000+ dollars to get him one for Christmas getting him one was out of the question until I traded an old motorcycle for a couple of guitars.

One of these was a very beat up and terribly modified Epiphone SG. It played pretty well (after an hour of tidying up ground loops and loose wires in the wiring cavity) but was still in terrible cosmetic and electrical shape. I read up a little and already had some experience working on guitars and figured that a custom painted and rebuilt guitar would be a nice gift and wouldn't be terribly hard. I was wrong.

I started by disassembling the whole thing down to it's base parts. I started a list of the problems with it.


Problems:
* Missing knob
* Ugly skull knobs
* Spray painted Zach Wyld bull's eye
* Flat black spray paint over entire rest of guitar
* Missing almost all pot/jack mounting hardware (washers, nuts, etc...)
* Chipped wood on back and under two knobs
* Grime and super glue stains on fretboard
* Roller nut attached by super glue
* Wiring (total rat nest)
* Stripped screws on a couple places
* Locking tuners missing top nuts

I could tell this thing would be a lot of work, but I also wanted to see if I could get it looking good, I wanted to give my nephew a nice axe, and I didn't have any money in it, so if I ruined it it wouldn't be too bad.

Next I needed to clean off the old paint. I thought the best way to do this would be with paint stripper. I liberally coated the back in paint stripper after a trip to the hardware store for supplies, but after getting through the top coat of spray paint, the factory candy apple red (damn! the color he wanted!) was too strong for the chemical to do much more than turn a little easier for me to pry loose from the wood than if it was dry. I moved on to trying to chip the paint off, since if the stock paint was in good condition I would be able to just restore that. That went out the window when the paint on the front had deep gouges where an exacto knife had been used to carve out some "sweet flames". I moved on to sandpaper.

60 grit sandpaper is a wonderful thing. Just a couple hours and what would be the start of Popeye-like forearm muscles later, I'd gotten the SG down to it's bare wood. I'd gotten the paint off the neck with the side of my trusty paint scraping knife. I was on a roll, but before I started spraying paint all willy-nilly I decided to do some research. The articles on ProjectGuitar.com are a wonderful resource for restoring and repairing guitars, but the more I read, the more I realized that with less than two weeks before Santa made his rounds to gorge himself on cookies there was no way I'd be able to finish in time. Instead, I gave my nephew the bare wood body, neck, and a sandwich bag of electronics and mounting hardware, and told him I was sorry it wasn't done, but I'd have it done before his birthday. He was ecstatic and excited to have me building him a guitar.

In the mean time I also had to get some parts. The SG came with some very nice EKG pickups, which just happened to be the very same ones a friend of mine was looking to put into an explorer he'd just gotten. I was wanting to go with less heavy sounding pickups for a broader range, and the stock explorer pickups were just about exactly what I was looking for. I traded the pickups out of his guitar and helped install the EKGs, then went to get some knobs and pickup bezels (probably not the right term) since the ones that came with the SG were terrible and beat up.

I then got back to the finish for the body. I'd discovered that the bridge mounting holes, which I'd assumed were molded into the body, were actually metal. They'd just been too covered in paint to tell. I sanded the body down to 200 grit sandpaper since the 60 grit left the body about as smooth as velcro. I then sprayed several coats of clear over that to seal the wood, leaving each coat at least one day to dry between. I wanted this to look as close to a professional paint job as spray paint from Lowes would get me. With each coat I sanded the body to help slowly smooth out imperfections. it was pretty much the same story with the color coat and clear coat. Hang body in garage, choke on paint fumes, wait a couple days, sand, repeat.

As the body got smoother and shinier I felt better and better about the decision to go with spray paint. Cut to two months later (and about 4 months of off and on time into this project) and I'd gotten ready to spray the second of many coats of clear coat on. As I sprayed, the clear stopped being clear. It turned into a milky white leaving the guitar looking like I'd ruined the paint somehow. I didn't know what had gone wrong. I'd done everything the same as before, the clearcoat was from the same can, and it wasn't too humid. I went to bed since it was late and I didn't know what else to do.


I came out the next day after class to inspect the damage and to my wonder, the guitar was a nice shiny red again. It turned out that the clear coat just behaved that way, so I added the last 7 or so coats of clear (WHAT A PAIN!) and got ready to start wet sanding. By this point my forearms had gotten tough enough that I felt like I had the wrist strength to bend steel. I guess pressing on something and doing who knows how many reps of back and forward for a few months will do that. Wet sanding is interesting, you don't feel like you're doing anything and progress is so slow you have no idea when it'll be done since "just a little more" could easily mean from 1-3 hours. Anyway, my nephew's birthday on St. Patrick's day was coming up quick, so I dedicated every spare minute I had to getting this guitar done before then. Wet sanding takes forever.

After I'd gotten the body to as near a perfectly smooth surface as I could, I used rubbing compound on it to bring it to a nice shine. I could finally see myself in it and see the work I'd done starting to look like a finished part of a guitar. It was about 4 days before people around the world would start upchucking green beer.

I mounted The parts I could, but there was still a problem with the roller nut, I had no way to make it stay or figure out how high to mount it. I cleared off all the super glue in about an hour, and swapped the tuning machines from my other guitar onto the SG's headstock and wired the electronics that night (it was the day before the party. I'd have to work on it some from work the next day before the party.


I wound up getting the last odds and ends finished, including a complete rewire since the one I'd done the previous night was totally wrong. Talk about cutting it close. I put the guitar in it's bag not even knowing if it worked and headed to present it. When I got to the party, I carried it in and told my nephew that I didn't get him anything other than the guitar for his birthday, but that since I'd already given him the guitar for Christmas, his birthday present was all the work, time, and brain cells I'd put into the guitar since then. It did wor and he loved it. People at the party could hardly believe him when he said I'd made it. I'm now known by his friends as "my uncle who made me the guitar". That kicks ass.
If I'd known how much work it would take to do this before starting would I have done it? Maybe not, but I think this way it's worth a lot more than a guitar I'd bought. I hope he gets many years of use and enjoyment out of it. You can see more photos from making this guitar on this Flickr set.