Monday, June 30, 2008

I made some cave paintings

Well, perhaps they aren't quite cave paintings, but a few weeks ago I was riding around on my scooter and noticed some graffiti tagged on a small bridge near my house. Ever since I was a little kid this bridge has had stupid things painted on and under it from white supremacist stuff to the usual crude pictures of wangs and cuss words a 12 year old who raided his dad's garage for a can of Krylon might get the urge to paint. It's always gotten on my nerves when I'd go by under the bridge and see all of that, and when I saw some of this on the top side of the bridge going by it sparked my interest in cleaning it all up some.

I started out just spraying white over the tag on the top of the bridge, but decided to use my day off to go ahead and paint over the junk under as well with some old paint I got free on craigslist. I loaded up the scooter and got to work white washing over phrases such as "yo daddy suck ass" and as I did so with a few different colors paredolia kicked in and I decided to make the blobbed over shapes in the paint into something (hopefully) more attractive.

I started out with one large splotch of blue that looked something like a big blue bird. I added detail to the head and came back to add the beak and whites of the eyes when I would switch paints. I also added a big tree next to it once I painted over something vertical next to it with brown.

There were seveal other things I made into paintings, including a night skyline that I'm happy with the results and detail of considering I was teetering on rocks the whole time, was using a 2" brush, and was only working with four colors. Even with all this though there were still many areas as you can see where all I did was basically paint over whatever offending remark was there. I did leave one original bit of paint that simply said "Hello"; under it I pained "HI" with a smiley face.


The cool thing is now for the first time I have something more interesting to look at any time I ride under the bridge and even though it's still graffiti I think it's a huge step up from what was previously under there. Here's to hoping it'll either be left alone or improved upon and not just mindlessly tagged over. The real question with all of this is does all this painting make me an arteest yet?

Sunday, June 29, 2008

I made a strange looking guitar

This is a project I've been messing with on and off for a long time now. Since I've known my friend Daniel I've been learning about guitars, the forms they've taken, and musical things in general. One thing I've often tried to do is imagine strange configurations or ways of modifying guitars to make them elicit a previously unknown sound, this proves to be very difficult since there have been close to 80 years of people doing strange things to guitars to amplify them. It seemed like every time I would think up or imagine some combination of parts to make a guitar do something none had before Daniel knew of some obscure instrument that does just such a thing or my idea had been tried and wasn't of any real use.

During one of my idea-making moments though, playing with one of his guitars while it was partially disassembled, I came up with an idea he hadn't heard of before. The idea was to take a Stratocaster-style guitar, and move the middle pickup to the outside of the guitar, sitting over top the neck pickup. I figured it might make for a clean sound like a single-coil pickup, but also be useful in clearing up the "hum" that humbuckers "buck", or cancel out.

Between the two of us, we got a Squire Bullet from a pawn shop, a simple, no frills strat and set about figuring out how to turn it into something neither of us had ever heard of. We eventually came up with the idea that as long as we're modifying the guitar and since we'd have to route room in the body for switches to set phasing, turn on/off pickups, and run pickups in series or parellel we might as well make a spot to move the bridge pickup and modify the bridge to have an extra run of strings below the bridge with a pickup under it. This would allow for the guitar to directly pick up playing on this short and high pitched length of strings. To the left is what a similar Bullet looks like, and what the Hoverbucker started out like.

I quickly dumpster dived some white sheet plastic (shower wall panel) and made blank copies of the Bullet's original pick guard. A month or two later I cut and shaped an old aluminum "out of order" sign into a replacement bridge and made a mount for the exposed pickup from some scrap plexi-glass and wood left over from making the lightbox. There won't be much of an ability to intonate the bridge without filing it down, but we'll cross that bridge when it comes (holy-crap-pun-lol). Since I'm not familiar with the specifics of setting intonation (I can scarcely tune a guitar) I'll leave that to Daniel to advise on. I also removed the bridge saddles from the stock tail piece so it can be used for a tail piece at the bottom of the guitar.

After that, I posted pictures and the idea on the Harmony Central Forums, asking anyone there for their input and ideas, as well as finding a wiring diagram for a similar setup that allowed for a lot of choice with regard to the switching setup. From here the project sat untouched for several more months while other things in life needed more attention such as school and my nephew's guitar. It went in a bag next to my hand made longbow that needs to be tuned and set. Now that I've had some time to work on it some more and I already had need of a router thanks to the cigar box guitars I've worked on over the last week I figured it would be a good time to make the body modifications that the hoverbucker guitar needed. I got to try my hand for the first time with both a table and hand-held router and they both were nice to use thanks to Mr. John's assistance explaining their proper use.

As a side note, this blog is serving as a good motivator for me to finish projects that have otherwise sat half-done for a while. It's nice having somewhere to show off the stuff I do with the added bonus that someone might actually care enough to read about it. What ever will I do for updates once I run out of half-finished projects to finish for a quick post's worth of material? I might have to go back to building things from start to finish. :O

Anyway, I then went about cutting up another of the pick guard blanks into a cover for the bridge pickup, I just cut it into a rectangle, rounded the corners, and smoothed it with a file. I then drilled some holes for the switches to mount into, widened the hole for the kill switch from the original volume knob hole, and for the screws in the bridge cover. I put it all together and dummied up everything in place. I have to wait until tommorow to get a DPDT switch to replace the SPDT switch I have in place for the phase switch right now, but you can get an idea of how it will all look now. I'm still not sure how it will work or if it will unlock some strange, never before heard sounds, but it certainly looks interesting so far and even if it's just a strat with an extra weird pickup it'll certainly be a unique instrument.

(Update 1)
I finished the guitar, and it does some interesting things. After showing it off on this Harmony Central thread it seems to be getting a good recepion. Here's a couple videos of Daniel playing it. He seems pretty stoked about it too.


As usual, there are more photos on my Flickr page.

Saturday, June 21, 2008

I Made a(nother) Cigar Box Guitar

About a year or so ago I read in Make magazine about how 
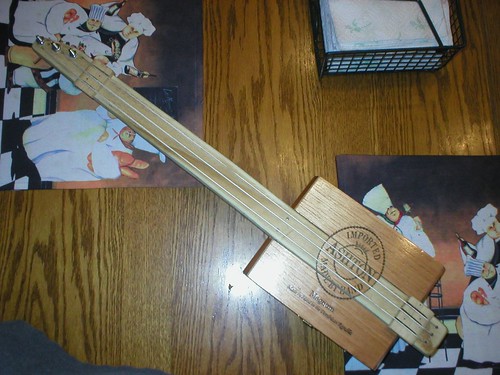
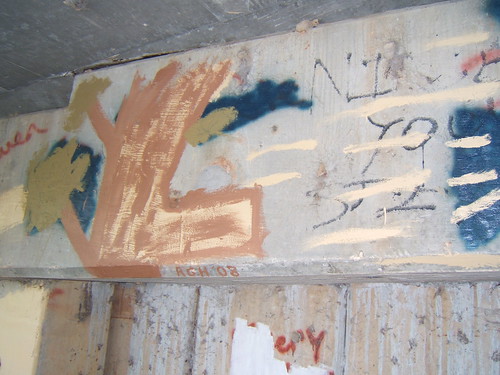
to make a guitar from basically a stick, some bolts, string, and a cigar box. I made one and it was a functional 3 string guitar, but it left a lot to be desired. It wouldn't hold tune, had no frets or fret markings, and didn't play very well for a number of other reasons. It did show me how easy making a stringed instrument can be though, and taught me a lot about the fundamentals of guitars. Pictured here is the old cigar box guitar.


Fast forward to today and I've since rebuilt one guitar from the wood up, rewired a couple, and generally learned more about them, and when I saw some nice cigar boxes for 50c a piece the other day I decided it was time to try my hand at making a better one. I got some parts first, with the strings and tuning machines being the only things I had to get that were purpose-made for a guitar. The rest of the materials were a couple thin pieces of red oak (quickly becoming a favorite wood of mine), a length of poplar, some dollar-store stainless shish kabob skewers, and some other odds and ends.

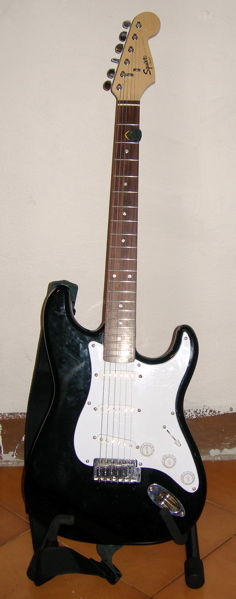
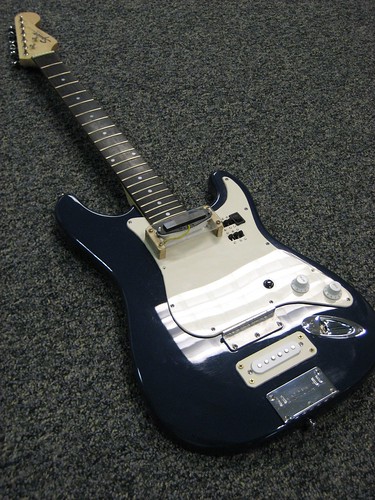
I decided that I wanted this guitar to be made to a full scale, so I copied the bridge length and fret pattern off my strat-o-monster (another top secret project everyone I know knows about). I also wanted to have the fretboard above the body of the guitar as most normal guitars have, so I did a lot of eye-balling and a little measuring and wound up with a layout that uses a piece of red oak as a shim and another as the fretboard. I decided the neck would be much too thick for anyone short of an orangutan to play with those two and the poplar neck together, and the tuning machines needed the headstock area to be thinner, so I went to work rasping down the needed areas.

Rasping always seems like it won't be too bad before I start. "I'm just taking off 1cm of wood, it's not too bad." an hour and a half later I'd roughed out the shape of the neck and ensured my Popeye-like forearms won't be going anywh
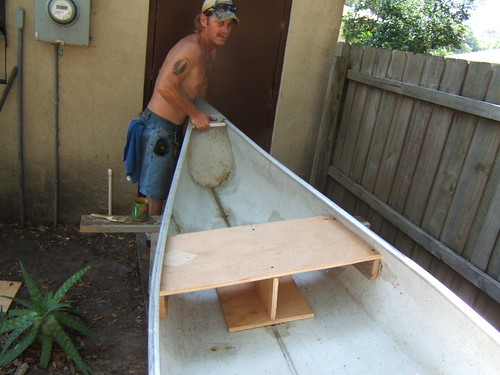
ere soon. I glued most of the neck together and smoothed all the pieces together with my trusty surform rasp. I also cut a pair of notches for the neck to stick through the body with. With the neck glued together, it slides into the box and begins to look like a guitar. The neck is super-wide. It'll mostly be used for playing slide though, so no worries.

I had to drill out new string holes in the tuning machines since the stock ones sat very low on the pegs. I picked up the cheapest set of tuning machines I could find, which wound up being for a classical guitar. I just made sure to drill the holes perpendicular to the stock ones to keep from weakening the pegs. The ornate brass style of them matches the look of the box well though.

A few ideas I was entertaining but decided against: (1)Making it 3 string. There was too much fretboard and I had the tuning machines already. (2)Adding frets. That was the original purpose of the skewers and superglue, but since the neck is so wide and I got too impatient to make the notches in the fretboard I justify pushing on by telling myself this is something like an old blues guitar and the wide neck won't hurt playing slide.
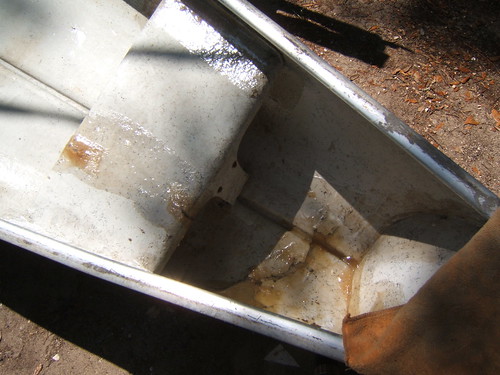
Update 1:
I tried to make do with a set of metal plates I had for the tail piece, but it didn't drop the strings low enough for them to hold over the bridge, so I'll have to use some L brackets and shape a curve down the tail end to let the strings drop some. It'll look better like that anyway. I cut the bottoms out of both boxes and glued them together for more of an air chamber. I also filed out some groves for the nut and bridge bolts to sit in, glued the neck, tail piece, and top box lid together. I'll leave the bottom lid unglued until I figure out how I want to mount a pickup.

Update 2:
I got the guitar pla
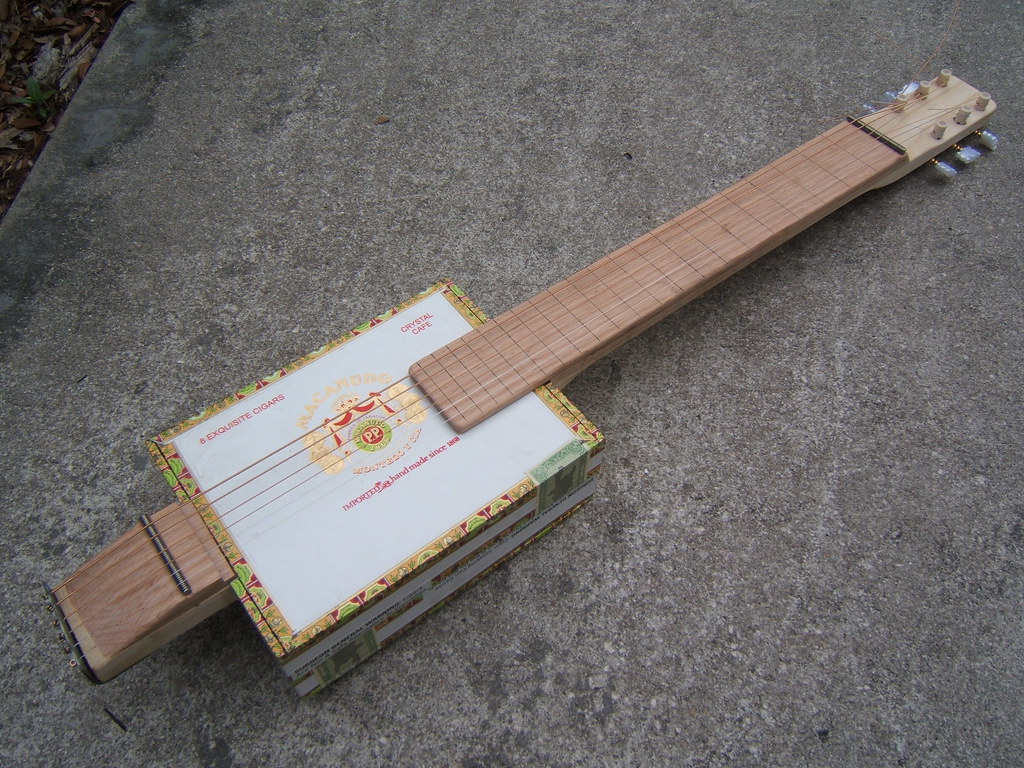
yable yesterday, adding the stop piece and stringing it. I filed down the tail end to let the strings get some fall, then made a stop piece from galvanized steel and strung the guitar. It still needs to be sanded, stained, and clear coated on the body, but it's playable and sounds pretty nice. The stacked boxes give it more volume than just one, and it works pretty well for slide. A friend who plays guitar says that it has a similar sound to a 12 string when played with slide. It also has a weird sympathetic effect coming from the bridge over the tail, which is interesting and not loud enough to be more than just noticeable. Though the neck doesn't have a truss rod it hasn't taken very much bow either, which was something I was concerned with initially.

Update 3:
I've finished sanding and clear coating the CBG, and I've also added bamboo frets. I also added a piezo pickup and jack so the guitar can be amplified. The frets could still use some fine tuning since there are a few places where a couple frets are short enough to cause fret buzz, but the piezo comes through very clearly and the guitar sounds very nice. I'll fix the maligned frets when
I get a chance, but it's very playable as-is as evidenced by my buddy Daniel shows below.


There are more pictures of this guitar on Flickr.

Update 4: Make: blog has posted about my CBG, Thanks guys! I've also made another guitar. It's pretty much the same, but I cleaned up some of the rough edges and clear coated the boxes before putting it all together. I might make some more, who knows.

Wednesday, June 18, 2008

I Made a Laptop Bag

For a long time now, I've had the luck of having a laptop, but the misfortune of having the battery shot to heck and I had to replace the screen on my Compaq laptop with an HP screen when it broke some time ago. It's also had a bad habit of dying for sometimes weeks at a time for some time now, and I finally decided to replace it with something I can get more reliability from since I had a little money saved up. I pinched my nose and went to the Apple store for a MacBook. Though I like being able to edit videos and audio with much more ease than on my Windows or Ubuntu machines, there's one physical problem with the MacBook. It's shiny. Too shiny. I'm not particularly gentle with my technology as my cell phone and old laptop would be quick to tell you if they could. I've been known to toss, drop, bite, and bury such things (sometimes deliberately).

I just spent 0ver 1000 dollars on the laptop I'm currently typing this on though, and I'd like to keep it in good shape as much as I can. One of the biggest hazard zones my old laptop faced on a regular basis was the inside of my backpack. With books, pens, clip boards, cables, tools, and who knows what else to bounce around with, I can see my shiny mac getting skinned up like a kid with new roller blades and a steep hill. I wanted a case for it, but didn't want anyting bulky or expensive, it also needed to be soft on the laptop. I've been wrapping it with a $3 towel from Big Lots for a few days, but it wasn't really ideal to wrap it like that into the foreseeable future.

Since the towel was already soft and large enough for holding the laptop though, I decided to take it from a loose toga to a custom tailored suit. Luckily, the towel was twice as wide as the laptop, which meant I could just fold it in half and it would hold the laptop without cutting the edges on the main edges. I folded it over and started to sew up the seam. I made sure to stitch the seams around the edge twice so I don't have to worry about it breaking, this also just made the whole thing look better since with one seam the edge of the towel was visible.

I sewed and I sewed and I cut the towel to shape and I sewed for about an hour and a half, and I had a nice fitting bag, but no way to close it. I didn't want to use buttons since the terrycloth would probably stretch over time so I cut some clips loose from an old worn out messenger bag I don't use and added some straps to them from a tie down strap I found on the side of the road. I melted the ends of the straps together so they won't fray and sewed those onto the bag. That was about all there was to it.

The finished bag should hold up well and when I showed it off to some friends they were pretty impressed. I might make another some time if the need arises out of a more sturdy towel, and If I do I'll be sure to use the sewing machine I didn't know was in the house until I was almost done.

Tuesday, June 10, 2008

I made a canoe float


A guy that works with my dad got hold of an old and very porous canoe a couple weeks ago. It looked like someone had dropped it off the back of a truck, which cracked, bent, and broke large holes all in the hull. The problem looked to have been made worse by someone who tried to fix the holes with a grinder rather than some sand paper. Some of the gaps in the fiberglass were as long as someone's arm and an inch or so wide, some were just big enough to see daylight through, and one was almost large enough to fit my head through. The tail end was tenuously held connected to the rest of the canoe with the aluminum along the top edge and hope. Unfortunately I lost the "before" pictures of the canoe, but as you can see below, the holes in the vessel would have ensured it went down in the water much faster than it went forward if you tried to take it out for a leisurely ride. The middle bracing support and the front seat were also missing in action, so replacements for those would have to be fashioned as well.

My dad, I, and his coworker started by covering the large holes with a slick black plastic that the fiberglass wouldn't stick to and the smaller ones with packing tape. We then cut some strips of fiberglass to size and mixed up some resin. It was a hot day, and fiberglass resin sets up fast when it's hot, so we had to work fast. We added to coats to the large holes on the outside, one coat on the small holes and inside, and generally coated anywhere that looked to be of questionable strength with more resin, which was most of the boat.

After all that had set up and hardened, we worked on the missing pieces, the middle beam and the front seat. we cut both out of wood, coating the middle beam in resin and fiberglassing the bottom of the seat to the boat. the whole thing looked almost seaworthy now.

I had to head to work before they were finished, but when I came back the next day, the canoe had been painted and apparently taken out. They said it worked as well as a new one. You wouldn't think that something that looked as much like a big piece of trash could be recovered like that so quickly. Very cool stuff