Friday, January 9, 2009

I Made Loud Shoes

Ever wondered what the Japanese used for footwear prior to western imperialism brought Adidas to the land of the rising sun? Me neither, but after noticing some odd raised wooden sandals in a couple TV shows worn by characters from such a time I looked into it and discovered "geta". Geta is the name of wooden Japanese sandals which are traditionally made of wood and are raised on two blocks (called teeth or ha). There was a time when the streets of Tokyo would have been alive with the clacking of people doing their thing in these shoes, and there are stores from elders who have fond memories of the din of people walking about in these.

There are tall geta for when it rains, different designs for men and women, and many variations from simple to elegant. I never knew I'd get so interested in a pair of shoes but here I am. I decided that it would be neat to have a custom-made pair of geta and when I stumbled into an online calculator for the measurements you need I printed out my measurements and the printout sat in my school folder for some months. I pulled it out yesterday though and went about getting a pair made.

They're a pretty simple piece of footwear to look at them: flat rectangular sole, two ha and a cloth thong to keep it on your foot. As with many things though the devil's in the details. The distance from the front ha to the tip of the geta gives you the lean your foot needs in stride since the sole doesn't bend with the foot so this measure is important, as is the height of the ha, width, length, and placement of the thong. With normal flip-flops, the thong is placed where the big toe is, but it's in the middle on geta. This lets it shift to the side while walking and keeps the square backs of th
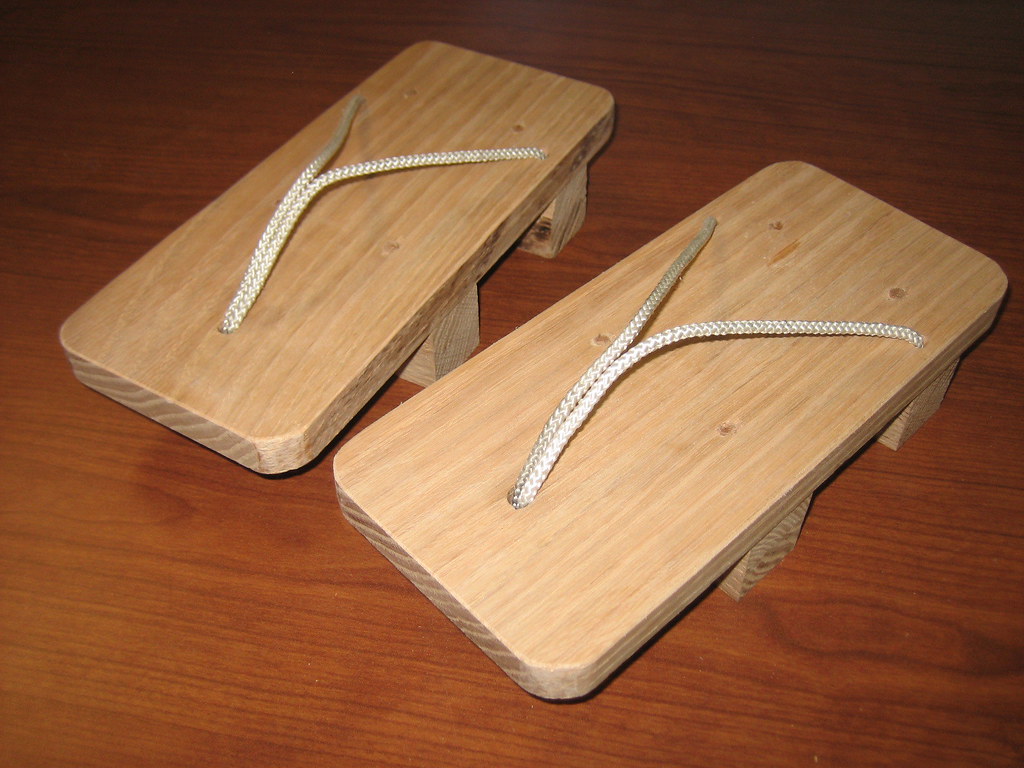
e shoes from hitting one another with each step.

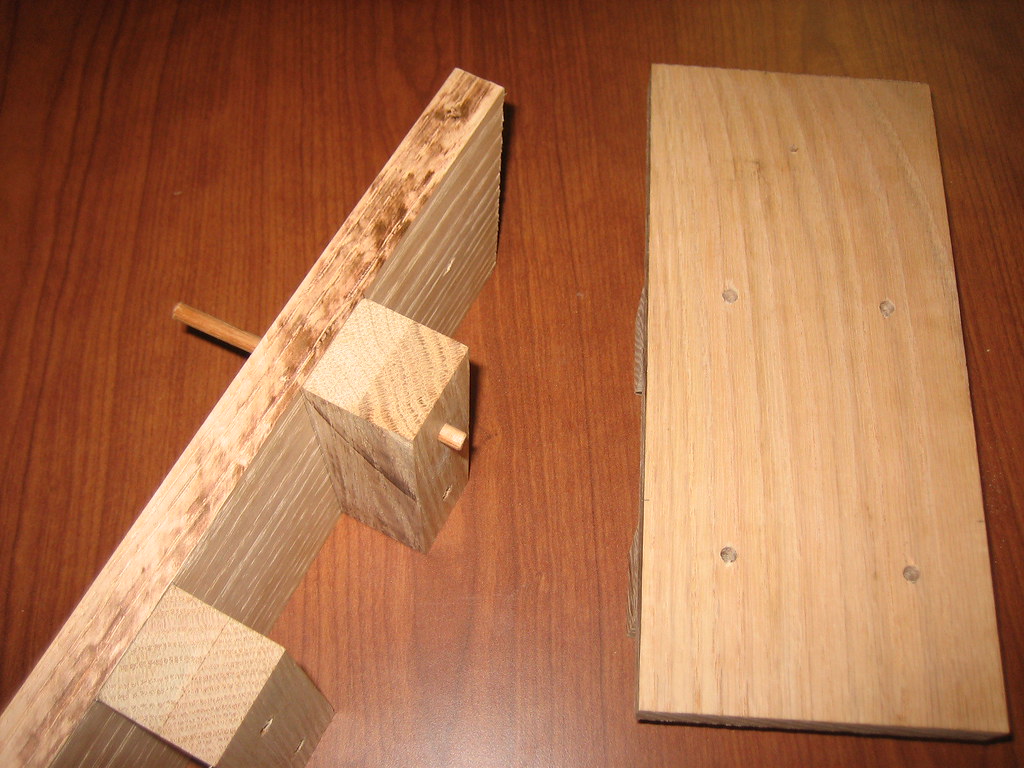
Anyway, on to the pair I made. They're red oak, cut to size and glued with 1/2" red oak dowel drilled and glued into ha and sole to firmly tie them together. The thong is made of nylon rope core for strength. If I make any more it will be with a 1/2" sole since the 1" red oak sole is much thicker than needed.

I made an instructable detailing the whole build so check it out if you'd like more detail on how to make a pair.

Wednesday, January 7, 2009

I Made a Dinosaur


After getting pretty decent with a welder, and seeing my scrap pile behind the shed grow large enough to support making something interesting, I set about making something from the cornucopia of scrap steel I'd collected.

I had a rough idea of a bipedal dinosaur or dragon in mind, but no specific plan or places for pieces in mind (points for alliteration?). I began with the legs, using the welder to very inefficiently cut the metal that would become the legs, then welded the feet to the base, held the ankle/lower legs in place, and tacked them down. Then I did the same for the femurs. I added the back right over the legs, then worked on the basic back outline, adding reinforcements to the tack welds and making sure to keep the whole thing balanced.

Once I had the basic body shape done, I started adding more detail like the ribs, toe claws, and leg pieces. To shape the curve of the tail, spine, and other larger parts, I simply beat dents into strategic parts of the piece, then hit it on a tree to get the curve I needed, which wasn't a very forgiving process on the hands even in welding gloves. While doing all the welding and grinding on paint and rust I got plenty of odd and scared looks from the rabbits in their pen.

I then needed to decide how to make the head and whether to make a dragon's wings or a dinosaur's arms. Since my stockpile was getting somewhat puny I decided to go for the latter, using drawer rails with locking latches to give the arms some range of motion. Then I began working on the head.

The head consists of some steering linkage, a bumper mount from, a rack-mountable spacer for the lower jaw, pieces from a lawn-ornament of a happy little man that had wound up on my neighbor's trash, and some political sign supports for teeth along with other bits of scrap. The tilt of the piece the head bolts to makes it lean to the left, which looks good with the rest of the t-rex's posture. After riding around for a couple days with it strapped into the bed of my truck I'm not sure what to do with it, so it stands guard at the front door for now.

EDIT 4-17-10:
Since making him, the steel dinosaur has seen music and art, and has also had a few color changes. Daniel and the guys of the band Anderdown (of which I was part at the time) brought "ROFL-saurus" to a show at Jacksonville's downtown art walk when we played. ROFL-saurus may have gotten more compliments than the music.

Some time after that I painted him brown and black to keep him from rusting too badly, but when Halloween came along I decided it was time for a more seasonal color. BRIGHT ORANGE! He had a few problems with the toes being too thin and breaking off, so recently as I was working on the archer my friend Barbara brought me some railroad spikes and tie plates. The spikes worked out great for new super-sturdy toes and with a fresh lick of orange pain to match things up ROFL-saurus is gracing the front yard, being stalked by the ever-steady aim of the archer and getting funny looks from the neighbors. Barbara was even awesome enough to come take and put together some nicely backdropped photos photos of the archer and dinosaur.